As an Amazon Associate, I earn from qualifying purchases at no extra cost to you.
How to Remove Ninja Blender Lid: A Complete Guide
 ByZayyan
We’ve all been there: you’re trying to make your favorite smoothie, but the Ninja blender lid just won’t budge. You twist and pull, but it feels like it’s stuck in a blender lid nightmare. Don’t worry! This guide will walk you through every step of removing that stubborn Ninja blender lid, and make sure you can get back to blending in no time. Let’s dive in!

Why Your Ninja Blender Lid Gets Stuck
When you’re in a rush to prepare your smoothie or soup, the last thing you need is a lid that refuses to come off. But it happens. Ninja blenders, like many other blenders, can occasionally face the issue of their lids getting stuck. So, why does this happen? Let’s explore the reasons behind it and figure out what might be causing this issue.
Air Pressure Build-Up
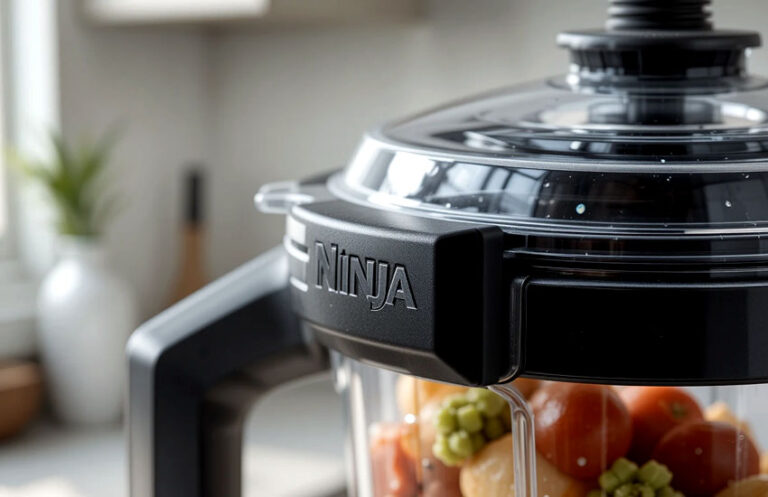
One common reason your Ninja blender lid might be stuck is due to air pressure. When you use the blender, the ingredients inside create a vacuum seal as the blades spin. The pressure can sometimes be enough to make it difficult for the lid to come off immediately. Essentially, the lid is vacuum-sealed in place.
Food Residue Around the Lid
If you’re someone who’s not super meticulous about cleaning the lid after each use, food residue can get stuck between the lid and the container. Over time, these food particles can cause friction, making it harder to twist the lid off when you need it. Cleaning your lid thoroughly after every use is one way to prevent this issue from happening frequently.
Wear and Tear
Like any kitchen appliance, your Ninja blender is bound to experience wear and tear over time. The lid’s rubber seal can degrade with frequent use, and sometimes it may get warped, making it more challenging to remove. If your lid has been through many rounds of smoothies or soups, it could be that age is catching up with it.
Improper Alignment
Another reason your Ninja blender lid might get stuck is due to improper alignment when closing it. If the lid wasn’t placed correctly before blending, the locking mechanisms on the lid and base could be out of sync. This can make it difficult to unlock or remove the lid after blending. Ensuring that you properly align the lid before using the blender can help avoid this problem.
Over-tightening the Lid
It’s easy to get carried away and over-tighten the lid, especially when you’re trying to ensure that it doesn’t leak. However, this can backfire and make it harder to remove the lid once you’re finished blending. Always tighten the lid snugly, but avoid cranking it down too hard.
Step-by-Step Guide on How to Remove the Ninja Blender Lid
Now that we understand why the lid might get stuck, let’s talk about how you can fix it. Here is a comprehensive, step-by-step guide to removing a stuck Ninja blender lid. Follow these tips and tricks to make the process a whole lot easier.
Step 1: Turn Off the Blender and Unplug It
Before attempting to remove the lid, always make sure that the blender is turned off and unplugged. Safety should be your first concern, especially when dealing with electrical appliances. You don’t want to risk an accident, so take a moment to ensure everything is turned off and safe to handle.
Step 2: Check for Food Residue
Take a quick glance at the rim of the blender container. Are there any bits of food or residue around the lid? If so, clean it off with a soft cloth or sponge. Sometimes a simple wipe-down is all you need to release the lid. This step can eliminate any extra friction that’s causing the lid to stay stuck.
Step 3: Try to Gently Twist the Lid
If there’s no visible residue, gently try twisting the lid counterclockwise. Use both hands and apply steady, even pressure. Don’t jerk or yank on the lid, as this could damage the lid or the container. Slow and steady wins the race here.
Step 4: Apply Gentle Heat
If the lid is still stubborn, applying a bit of heat can help loosen it. Take a warm, damp cloth and wrap it around the lid for a minute or two. The warmth will cause the plastic and rubber seal to expand slightly, which could break the seal and make it easier to twist the lid off. Be sure the cloth isn’t too hot to handle.
Step 5: Use a Rubber Grip or Towel
Sometimes, the lid can be a little too slippery to get a good grip on. If you’re struggling to twist the lid, try using a rubber grip or a towel. Place it over the lid and twist. The extra grip will give you more leverage, and you’ll have a better chance of getting the lid off without damaging anything.
Step 6: Tap the Lid Gently
If the above steps don’t work, you can gently tap the lid on a hard surface. This action can help to break the vacuum seal and make it easier to open. Be careful not to tap it too hard, as you don’t want to crack or break any part of the lid or blender container. A light tap should be sufficient.
Step 7: Try the Freezer Trick
In extreme cases, if the lid is still stuck, you can try placing the blender container in the freezer for a little while. Freezing the container can cause the materials to contract slightly, loosening the grip of the lid. Leave it in the freezer for about 10-15 minutes, then try twisting the lid again.
Preventing Your Ninja Blender Lid from Getting Stuck Again
Once you’ve successfully removed the lid, you don’t want to find yourself in the same situation again. Here are some tips to prevent your Ninja blender lid from getting stuck in the future:
Regular Cleaning
After every use, take a few minutes to clean the lid and the blender container thoroughly. Use warm, soapy water and scrub any food residue from the lid’s rubber seal. It may seem like a small task, but it goes a long way in ensuring that your blender lid stays in good condition.
Check the Seal for Damage
Periodically inspect the rubber seal on the lid to ensure it’s not cracked or worn out. If you notice any damage, it might be time to replace the seal. A damaged seal can cause the lid to become too tight or hard to remove.
Avoid Over-tightening the Lid
Be mindful of how tightly you screw on the lid. Tighten it until it’s secure, but don’t go overboard. If you tighten it too much, it can make the lid much harder to remove later. It’s all about finding that balance.
Store the Lid Properly
When you’re not using the blender, store the lid in a dry, safe place. Don’t leave it exposed to extreme temperatures, as this could cause it to warp or degrade. Keeping the lid in a cool, dry place will help extend its lifespan.
I hope these steps help you remove your stuck Ninja blender lid without too much hassle. Sometimes it’s just a matter of a little patience and the right technique. If you follow these tips and tricks, you should be able to prevent this problem from happening again in the future.

Frequently Asked Questions
Is it safe to use a Ninja blender if the lid is damaged?
While it’s possible to use the blender with a damaged lid, it’s not recommended. A damaged lid can lead to leaks or even accidents while blending. It’s best to replace the lid or seal as soon as possible.
Can I fix a warped blender lid at home?
Fixing a warped lid is tricky, and it might be better to replace it entirely. In some cases, you can try heating the lid slightly and gently reshaping it, but this may not always work.
Do I need to apply oil to the rubber seal on the Ninja blender lid?
Applying oil to the rubber seal isn’t necessary, and it could actually make the situation worse. The rubber seals are designed to work best without extra lubrication. Keeping them clean and dry is the best approach.
Is it normal for my Ninja blender lid to get stuck sometimes?
Yes, it’s normal for the lid to get stuck occasionally, especially if the blender has been used frequently. With proper care and maintenance, you can minimize the likelihood of this happening.
Can I prevent the air pressure build-up in the blender lid?
You can’t completely prevent air pressure buildup, but you can help release the pressure by allowing the blender to cool down for a few moments before attempting to remove the lid.
Is it okay to store the Ninja blender lid upside down?
Storing the lid upside down is fine as long as it’s placed in a clean, dry area. It’s important to store it in a way that doesn’t put pressure on the rubber seal.
Do I need to replace my Ninja blender lid every year?
There’s no set timeline for replacing your Ninja blender lid, but you should inspect it regularly for signs of wear and tear. If you notice any cracks, warping, or damage to the rubber seal, it’s time to replace it.
Can I use a different brand lid on my Ninja blender?
It’s best to use the lid designed specifically for your Ninja blender model. Other brand lids may not fit properly or create a proper seal, potentially causing issues with blending.