As an Amazon Associate, I earn from qualifying purchases at no extra cost to you.
How to Change Cartridge in Moen Kitchen Faucet
 ByZayyan
If your Moen kitchen faucet starts dripping or the water flow feels off, it is probably asking for a new cartridge. I remember one evening, dishes piled high, and a tiny drip that wouldn’t stop. At first, I ignored it, thinking it was a minor annoyance. But by the time the faucet started leaking faster, I realized I had to tackle it. Changing the cartridge isn’t scary, and with a little patience, your faucet can feel brand new again.
Turn off the water supply under the sink and relieve pressure by opening the faucet․ Remove the handle by loosening the screw or cap․ Carefully lift off the decorative parts and retain all small pieces․ Use an adjustable wrench or cartridge puller to remove the old cartridge․ Inspect the faucet body for debris or corrosion․ Insert the new cartridge ensuring it aligns correctly․ Tighten it securely without over-torquing․ Reassemble the handle and decorative pieces․ Restore water supply slowly․ Test for leaks and smooth operation․ Clean up any tools or water․ Enjoy a faucet that feels brand new and drip-free.
Preparing Your Space and Tools
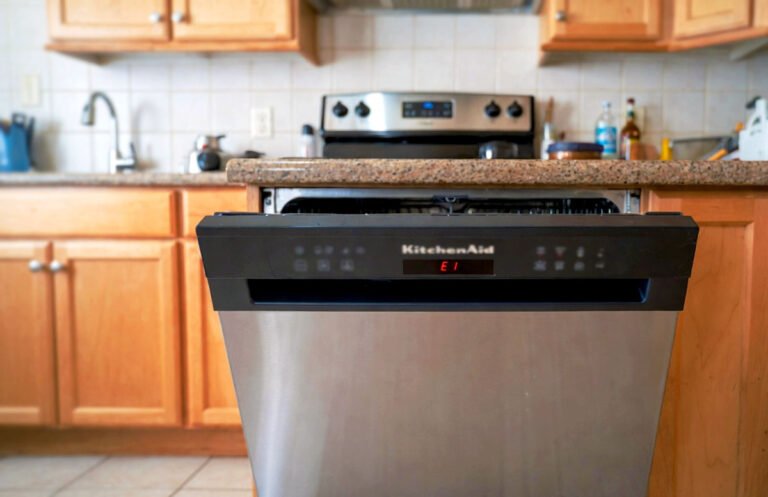
Before diving under the sink, gather everything you will need and clear the area. Nothing is more frustrating than finding out you need a tool mid-job while balancing under the sink. I like to lay down a small towel to catch drips and keep screws from rolling away. You will need an adjustable wrench, a cartridge puller if necessary, a small Allen wrench, and possibly some plumber’s grease. Having everything at hand saves time and stress.
Lighting is another factor often overlooked. The first time I tried this under a dim basement light, I strained for an hour just to see the screws. A headlamp or bright flashlight makes a huge difference. You might also want a small container for tiny parts. Removing a cartridge involves dealing with small nuts and retaining clips, and they love to escape into the shadows. Take a moment to mentally picture the reassembly process so nothing surprises you later.
Clear communication helps if someone else is around. Ask them to hold a flashlight or hand you tools. Even if you work alone, talking through each part can help you focus and avoid mistakes. At this stage, patience and preparation are half the job. The more organized your setup, the smoother the replacement will be.
- Gather all tools before starting
- Clear workspace and lay down towels
- Ensure proper lighting for visibility
- Plan for small parts and reassembly
Shutting Off Water and Removing the Handle
Start by shutting off the water supply under your sink. Forgetting this can turn a small repair into a soaking mess. Turn both the hot and cold valves clockwise until they stop. Once done, relieve pressure by opening the faucet fully. You will hear a hiss or feel a small release of water, which is normal and necessary to prevent spills later.
Next, remove the handle. Some Moen handles have a small cap covering the screw. Pry it gently with a flathead screwdriver. Loosen the screw carefully using an Allen wrench or a screwdriver depending on your model. I once stripped a screw because I rushed this part, so take your time. Pull the handle straight up, sometimes it takes a gentle wiggle. Avoid using too much force, as scratching the faucet is easy.
Once the handle is off, you will see the decorative parts and possibly a retaining nut. Keep these in a small container so nothing gets lost. Notice how the pieces sit together, sometimes taking a photo helps for reassembly. Touching each piece, you may notice mineral buildup or grime. A quick wipe with a damp cloth now will make everything easier to handle.
Finally, stay calm and steady. This stage is all about access and control. Rushing can lead to stripped screws or bent handles, which adds stress unnecessarily. With the handle off, you are now ready for the cartridge itself.
- Shut off both hot and cold water valves
- Release pressure by opening the faucet
- Remove handle carefully without scratching
- Collect decorative parts and screws in a safe container
Removing the Old Cartridge
With the handle and decorative parts removed, the cartridge is visible and ready for removal. Moen cartridges are usually held in place with a retaining clip or nut. Use your cartridge puller if it feels tight, or gently wiggle it out with pliers. I remember one stubborn cartridge that refused to budge, and a small spray of vinegar helped loosen the mineral deposits. Patience and gentle force are key.
Inspect the faucet body once the cartridge is out. Look for mineral buildup, grime, or small debris that could interfere with the new cartridge. I like to run a damp cloth or a soft brush around the area, ensuring everything is clean. A clean faucet body makes installation much smoother and reduces the chance of leaks later.
Before inserting the new cartridge, apply a small amount of plumber’s grease on the O-rings. It may seem minor, but it helps everything slide into place and prevents future sticking. Align the cartridge correctly; Moen cartridges often have alignment tabs that must fit precisely into the faucet body. Misalignment can cause leaks or make the handle feel stiff.
Remove the old cartridge carefully, clean the faucet, and apply a bit of grease. Treat it gently as though you are handling a delicate instrument. These small acts save time and frustration when installing the new cartridge.
- Use a cartridge puller or pliers to remove old cartridge
- Clean faucet body of debris and mineral deposits
- Apply plumber’s grease to O-rings
- Align cartridge properly before insertion
Installing the New Cartridge
Place the new cartridge carefully into the faucet body. Align the tabs correctly to ensure smooth operation. Push it gently into position until it sits flush. I sometimes hum a little to calm my nerves during this part because forcing it can cause damage, and taking a moment of patience pays off.
Secure the cartridge using the retaining nut or clip. Tighten firmly but avoid over-torquing, as that can crack plastic parts. If using a wrench, check that it is snug, not excessively tight. I like to imagine I am tightening a watch screw, delicate but decisive. Once secured, give the cartridge a small wiggle to ensure it sits properly and will move freely with the handle.
Reassemble the decorative parts in the reverse order of removal. Take note of orientation and alignment for the handle, especially if your faucet has a specific directional flow for hot and cold. When reattaching the handle, press down gently and tighten the screw securely. The faucet should move smoothly without wobbling or binding.
Check everything visually, making sure no pieces are bent or misaligned. Pat yourself on the back because this is the point where your faucet starts to feel alive again. Smooth operation, no leaks, and a sense of accomplishment make this small repair surprisingly satisfying.
- Insert new cartridge carefully
- Tighten retaining nut without over-torquing
- Reassemble decorative parts and handle
- Ensure proper alignment and smooth operation
Testing and Troubleshooting
Turn on the water supply slowly and observe the faucet. Open both hot and cold valves gradually to avoid a sudden surge of pressure. Listen carefully for any drips or hissing sounds, as this indicates incomplete installation or misalignment. I remember a tiny drip that took me a minute to locate; patience and observation are key.
Operate the handle through its full range of motion. It should feel smooth, not stiff or jerky. If it sticks, check the cartridge alignment or O-ring placement. Sometimes small adjustments make all the difference. Feel the temperature and flow; the water should transition evenly between hot and cold.
If there are minor leaks, shut off the water and retighten the retaining nut gently. Avoid over-tightening, as it can damage the plastic components. Cleaning up any drips now prevents water spots and keeps the sink area neat. I keep a small towel ready under the faucet for these tests to catch any stray drops.
Once satisfied, wipe the faucet and surrounding area. The faucet should feel steady and functional. Enjoy the subtle satisfaction of a faucet that no longer drips and a small home repair successfully completed.
- Turn on water slowly and observe for leaks
- Test handle for smooth operation
- Adjust retaining nut if minor leaks occur
- Clean and dry area around faucet
Maintaining Your Moen Faucet
Regular maintenance keeps your faucet in top condition. Wipe the handle and spout weekly to prevent mineral buildup. I use a damp cloth and occasionally a vinegar solution for stubborn spots. Keeping the faucet clean reduces the risk of cartridges sticking or leaks forming over time.
Check the water flow periodically. A sudden change may indicate debris or wear in the cartridge. Catching this early makes replacement much easier and avoids extended drips. I usually mark a reminder on my calendar every six months to inspect the faucet. Small attention now saves big headaches later.
If your faucet sees heavy use, consider a gentle lubrication of moving parts once a year. Use plumber’s grease sparingly on O-rings and sliding parts. Avoid harsh chemicals that can corrode metal or plastic components. A little preventive care keeps your faucet feeling smooth and reduces the chance of an emergency repair.
Finally, store spare cartridges or small parts in a labeled container. Life is unpredictable, and having a backup on hand means future leaks can be fixed quickly. A little preparation turns a potentially stressful situation into a manageable and even satisfying repair.
- Wipe faucet weekly to prevent buildup
- Inspect water flow periodically
- Lubricate O-rings and moving parts yearly
- Keep spare parts for quick repairs
Final Thoughts
Changing the cartridge in a Moen kitchen faucet is less intimidating than it seems. With preparation, patience, and the right tools, even a novice can restore smooth water flow. Take your time, follow each step, and enjoy the small victory of a drip-free faucet. Small home repairs like this are empowering, practical, and surprisingly satisfying.
| Action | Details | Tips |
|---|---|---|
| Gather tools | Wrench, Allen keys, cartridge puller, towels | Keep everything within reach |
| Turn off water | Hot and cold valves under sink | Open faucet to relieve pressure |
| Remove handle | Unscrew with Allen wrench or screwdriver | Keep small parts in a container |
| Remove cartridge | Use puller or pliers gently | Soak in vinegar if stuck |
| Clean faucet body | Remove debris and mineral buildup | Use soft cloth or brush |
| Apply plumber’s grease | Lightly on O-rings | Ensures smooth operation |
| Install new cartridge | Align tabs correctly | Push gently, do not force |
| Reassemble & test | Replace decorative parts and handle | Test water flow and check leaks |
Frequently Asked Questions (FAQs)
Is it difficult to change a Moen kitchen faucet cartridge?
Not at all. With basic tools and patience, anyone can replace it. The process involves turning off water, removing the handle, taking out the old cartridge, inserting a new one, and reassembling the faucet. Most challenges come from tight fittings or minor mineral buildup, which can be handled with gentle tools or vinegar. With careful observation and slow movements, even a beginner can complete the repair successfully.
Can I use any cartridge for my Moen faucet?
No, it is important to use the exact cartridge model specified for your faucet. Moen faucets have different designs, and using the wrong cartridge can lead to leaks or poor handle movement. Check the model number on the faucet or packaging and match it carefully. Buying from an authorized dealer ensures compatibility and durability, saving frustration and potential damage.
Do I need a plumber to replace the cartridge?
Not necessarily. Most homeowners can replace the cartridge themselves with basic tools and guidance. A plumber may be useful if the faucet is unusually tight, corroded, or hard to access. Taking your time, preparing a clean workspace, and following instructions allows a DIY approach that is cost-effective and rewarding.
Is plumber’s grease necessary when installing a new cartridge?
Yes, a light application on O-rings helps the cartridge slide in smoothly, prevents sticking, and reduces wear. It also makes future replacements easier. Too much grease is unnecessary, but a small amount ensures proper lubrication without attracting debris or causing leaks.
Can I fix a leaking faucet without replacing the cartridge?
Sometimes minor leaks can be fixed by cleaning the existing cartridge and O-rings, but most persistent drips indicate wear. Replacing the cartridge ensures a lasting solution, restores smooth operation, and prevents water waste. Trying to patch an old cartridge may be temporary and frustrating.
Do I need to turn off the water supply completely?
Yes, shutting off both hot and cold valves is essential. Opening the faucet afterward releases pressure, preventing spills and water damage during cartridge removal. Skipping this step can lead to an uncontrolled flow and a messy situation, so patience here saves headaches.
Is it normal for a new cartridge to feel stiff initially?
Yes, some stiffness is expected until the O-rings settle into place. Operating the handle gently a few times will help it loosen. If stiffness persists, check alignment and lubrication. Avoid forcing the handle, as that can damage components.
Can I keep a spare Moen cartridge at home?
Absolutely, storing a spare cartridge is wise. Faucets can start dripping unexpectedly, and having a replacement ready allows for quick fixes. Label it and keep it in a small container with instructions. This small preparation saves time, water, and stress.