As an Amazon Associate, I earn from qualifying purchases at no extra cost to you.
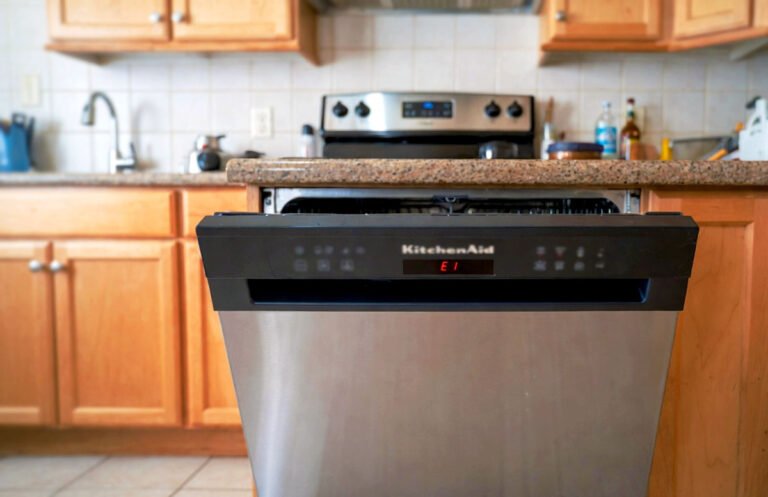
How to Change Moen Bathroom Faucet Cartridge (Quick Steps)
 ByZayyan
Have you ever turned on your bathroom faucet and noticed a slow drip that just won’t quit? I remember one rainy evening staring at my Moen faucet, frustrated as the constant drip echoed like a tiny drum in my quiet bathroom. Little did I know, changing the cartridge was simpler than I feared, and it saved me from a plumbing disaster while teaching me a few tricks I now swear by.
Turn off your water supply and open the faucet to relieve pressure. Remove the handle using a screwdriver or Allen wrench. Take off any decorative caps and the retaining nut. Pull out the old cartridge and compare it with a new Moen cartridge to ensure an exact match. Apply plumber’s grease lightly on the O-rings of the new cartridge. Insert the cartridge carefully, secure the retaining nut, reattach the handle, and turn on the water supply. Test the faucet for leaks and smooth operation, adjusting if needed.
Identifying Your Moen Faucet Cartridge
Before you start, it’s crucial to identify the type of cartridge in your Moen faucet. I once tried replacing a cartridge without checking first and ended up buying the wrong one. The main types are Moen 1222, 1255, 1225, and 1224. Look for model numbers on your faucet or in your paperwork, or remove the old cartridge to compare it at the store. Even tiny differences in size or shape can make the faucet work incorrectly or leak.
When you remove the handle, gently pry off decorative caps and look for the retaining nut. If it’s stuck, a bit of penetrating oil can help loosen it. Take a moment to study the cartridge’s orientation. Some have a notch or indicator that shows how it sits inside the faucet body. You’ll thank yourself later when the new cartridge slides in smoothly without forcing it.
Sometimes, mineral buildup can make the cartridge appear stuck. Use a soft cloth or a toothbrush to remove debris. Avoid harsh scrapers that could scratch the faucet or affect the seal. If you’ve lived in a hard water area, this step might take extra patience, but it prevents leaks and makes installation easier.
Once you’ve identified the correct cartridge, lay it on a clean towel with the new one beside it. Comparing them side by side ensures no mistakes. This small step saved me from multiple trips to the hardware store and a lot of frustration.
- Check model number before purchasing
- Remove decorative caps and handle carefully
- Loosen retaining nut gently
- Compare old cartridge to new
Preparing Your Workspace
I learned the hard way that a wet, cluttered sink can turn a small plumbing job into chaos. Start by clearing everything off your countertop. Place a towel or a small basin under the faucet to catch any drips or loose screws. Even the simplest Moen faucet repair can become a mess if tools slip into the sink.
Gather all the tools you’ll need before starting: adjustable wrench, Allen wrench, screwdrivers, and plumber’s grease. Having everything at arm’s length prevents repeated trips back and forth, which is surprisingly frustrating when your bathroom floor is full of towels and dripping water. Also, gloves can protect your hands from minor scratches and cleaning chemicals.
Make sure the water supply is fully turned off. Sometimes people think closing the faucet is enough, but residual water can gush when the cartridge comes out. Open the faucet after shutting off the supply to release any trapped water. A small bowl underneath will catch remaining drops, which keeps the area dry and avoids that “drip panic” feeling I always get.
Finally, have a flashlight handy. Faucet bodies can be deep and shadowed, making it hard to see retaining nuts or O-rings. A focused beam of light helps spot tiny parts and ensures you don’t lose them inside the faucet, which can turn a ten-minute job into an hour-long scavenger hunt.
- Clear sink area and lay towels
- Gather all tools
- Shut off water and release pressure
- Use a flashlight for visibility
Removing the Old Cartridge
Now comes the part that can feel a little intimidating. Start by removing the handle using an Allen wrench or screwdriver. I remember one time my handle seemed glued in place, and a gentle wiggle finally freed it without damage. Avoid using brute force; Moen handles are designed to come off with patience.
Next, take off any decorative caps and the retaining nut. This nut is usually snug but not overly tight. If it won’t budge, a touch of penetrating oil or a gentle tap with a rubber mallet often works wonders. Don’t risk stripping the nut—it makes reinstallation a nightmare. Once loosened, lift the cartridge straight out to avoid bending or damaging internal parts.
Pay attention to orientation and alignment. The cartridge may have tabs or notches that need to match the faucet body. I like to take a quick photo at this stage to remind myself exactly how it sits. It sounds minor, but when your hands are wet and greasy, a reference image prevents mistakes and guesswork.
Clean the faucet interior while the cartridge is out. Mineral deposits, old plumber’s tape, and grime can cause leaks or restrict smooth movement. Use a soft brush and vinegar if needed. Taking this extra time makes the new cartridge last longer and saves headaches later.
- Remove handle gently
- Loosen retaining nut carefully
- Lift cartridge straight out
- Clean faucet interior
Installing the New Cartridge
With the old cartridge out, grab the new Moen cartridge. Apply a thin layer of plumber’s grease to the O-rings. This step is crucial because it ensures a smooth fit and prevents leaks. Don’t overdo the grease—it only needs a light coating.
Slide the cartridge into the faucet body, matching any tabs or notches exactly as noted during removal. This is where patience pays off. A cartridge inserted incorrectly can cause leaks or make the handle stiff. I once forced a cartridge in backward and had to redo the whole process, so take a slow, deliberate approach.
Once aligned, tighten the retaining nut just enough to hold the cartridge firmly. Avoid overtightening, which can crack the faucet body or damage seals. Reattach the handle and decorative caps, pressing them gently into place. If they don’t sit flush, double-check the cartridge alignment—it’s almost always the culprit.
Finally, turn the water supply back on and test the faucet. Open and close it several times, checking for smooth operation and leaks. If the handle feels stiff or water dribbles, you may need to adjust the cartridge slightly. This final check gives peace of mind and ensures your work won’t cause surprise drips overnight.
- Grease O-rings lightly
- Align cartridge carefully
- Tighten retaining nut gently
- Test faucet and check for leaks
Troubleshooting Common Issues
Even after careful installation, issues can pop up. If water leaks, first check the O-ring placement. Sometimes they shift slightly during installation, causing drips. I learned this when a faucet that seemed perfect at first started leaking hours later. Removing the cartridge to reset the O-rings solved it immediately.
Stiff handles are another common frustration. Usually, this happens when the cartridge isn’t perfectly aligned or needs a tiny bit more plumber’s grease. Avoid forcing it—gently loosen and realign, then test again. Smooth motion is possible without brute force if everything is seated correctly.
If your faucet still drips after these fixes, the problem might be debris inside the faucet body. Mineral buildup can prevent a proper seal. Remove the cartridge and clean the interior with vinegar or a soft brush. It’s a little tedious, but the faucet will thank you with years of quiet, drip-free operation.
Occasionally, the wrong cartridge was purchased. This usually manifests as leaks or stiff handles even after repeated adjustments. Double-check your model number or bring the old cartridge to the store. A correct match is critical and saves frustration and repeat trips.
- Check O-ring placement
- Adjust cartridge alignment
- Clean interior for mineral buildup
- Confirm correct cartridge model
Maintaining Your Moen Faucet
Preventing future issues starts with simple maintenance. I like to clean my faucet monthly with a mild solution to remove mineral deposits before they harden. Avoid abrasive cleaners that can scratch the finish. A little soap and water with a soft cloth goes a long way.
Regularly check handles and O-rings for wear. Even if your faucet isn’t leaking, small changes in handle resistance or minor drips can signal it’s time for a check. Early detection prevents full cartridge replacement later.
Keep a spare Moen cartridge on hand if your model is older. I once had a drip in the middle of the night and was grateful I could fix it without a late-night hardware store run. Storing small parts in a labeled bag or box keeps them handy and organized.
Finally, take your time with each repair. Rushing increases mistakes and can turn a simple job into a stressful one. Enjoy the process—there’s a satisfaction in fixing something with your own hands, and your bathroom will feel the quiet reward.
- Clean faucet regularly
- Inspect handles and O-rings
- Keep spare cartridge available
- Take time with repairs
Final Thoughts
Changing a Moen bathroom faucet cartridge isn’t as daunting as it sounds. With careful identification, proper tools, and patience, you can fix drips and enjoy a smooth faucet in no time. Small mistakes are easy to recover from, and the satisfaction of a job done right is worth the effort. Your bathroom will feel fresh, functional, and leak-free.
| Action | Details | Tips |
|---|---|---|
| Turn off water supply | Locate shutoff valves under sink | Open faucet to release pressure |
| Remove handle | Use Allen wrench or screwdriver | Gently wiggle if stuck |
| Remove decorative caps & nut | Pry off caps, loosen nut | Use penetrating oil if tight |
| Take out old cartridge | Pull straight up | Note orientation or take a photo |
| Clean faucet interior | Remove mineral deposits | Use soft brush and vinegar |
| Apply plumber’s grease | Light coat on O-rings | Avoid excess grease |
| Install new cartridge | Match tabs/notches carefully | Press gently, avoid force |
| Reassemble & test | Tighten nut, replace handle | Open water slowly, check leaks |
Frequently Asked Questions (FAQs)
Is it difficult to change a Moen bathroom faucet cartridge?
Not at all, if you take your time. Most Moen cartridges are designed for DIY replacement. With basic tools like an Allen wrench, screwdriver, and some plumber’s grease, you can remove the old cartridge, clean the faucet body, and install a new one. Patience is key, especially when aligning tabs or dealing with mineral buildup. Even if you make small mistakes, the process is reversible, and the learning curve is short.
Can I use any Moen cartridge for my faucet?
No, Moen cartridges come in different models like 1222, 1255, or 1225. Using the wrong cartridge can cause leaks, stiff handles, or improper water flow. Always check the model number on your old cartridge or in your faucet paperwork. Bringing the old cartridge to the store is the safest way to ensure you get the correct replacement.
Do I need a plumber to change the cartridge?
Most homeowners can handle it themselves. Plumber assistance is only necessary if the faucet is severely corroded or stuck, or if you’re uncomfortable with tools. Moen faucets are designed for easy cartridge replacement, making DIY repair both practical and cost-effective.
Is plumber’s grease really necessary?
Yes, a light coat on the O-rings ensures smooth operation and prevents leaks. Too much grease is unnecessary, but without any, the cartridge can be difficult to insert or may leak. It also helps prevent wear over time, extending the life of the faucet.
Can I fix a dripping faucet without replacing the cartridge?
Sometimes, minor drips are caused by debris or worn O-rings. Cleaning the faucet body or replacing just the O-rings may temporarily solve the issue. However, if the cartridge itself is worn, full replacement is the most reliable solution.
Do I need to shut off both hot and cold water?
Yes, always shut off both. Leaving one line open can cause water to spray when you remove the cartridge, creating a mess and risking water damage. Opening the faucet afterward releases residual pressure and keeps the area safe.
Can I reuse the old cartridge?
Generally, reusing an old cartridge is not recommended. Worn parts and O-rings can cause leaks. Always replace with a new Moen cartridge for the best long-term results. It ensures proper fit and smooth operation without future surprises.
Is it normal for the handle to feel stiff after installation?
A slightly stiff handle may indicate the cartridge is misaligned or needs a tiny bit more grease. Avoid forcing it. Loosen the retaining nut, realign the cartridge, and test again. Once properly seated, the handle should move smoothly with consistent resistance.