As an Amazon Associate, I earn from qualifying purchases at no extra cost to you.
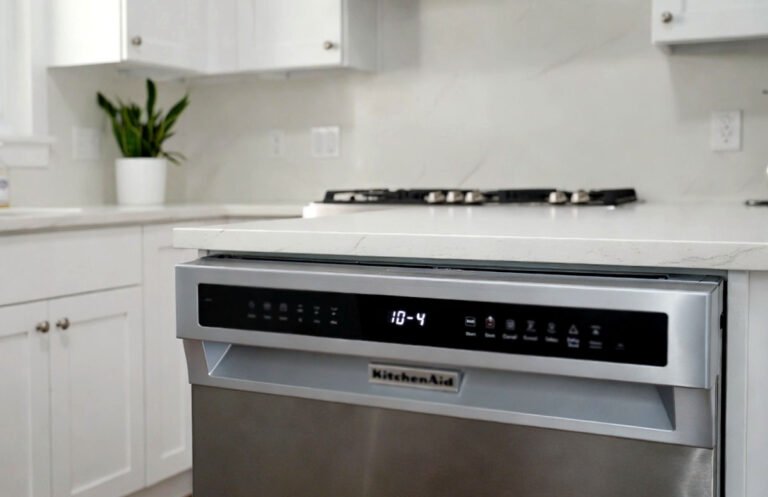
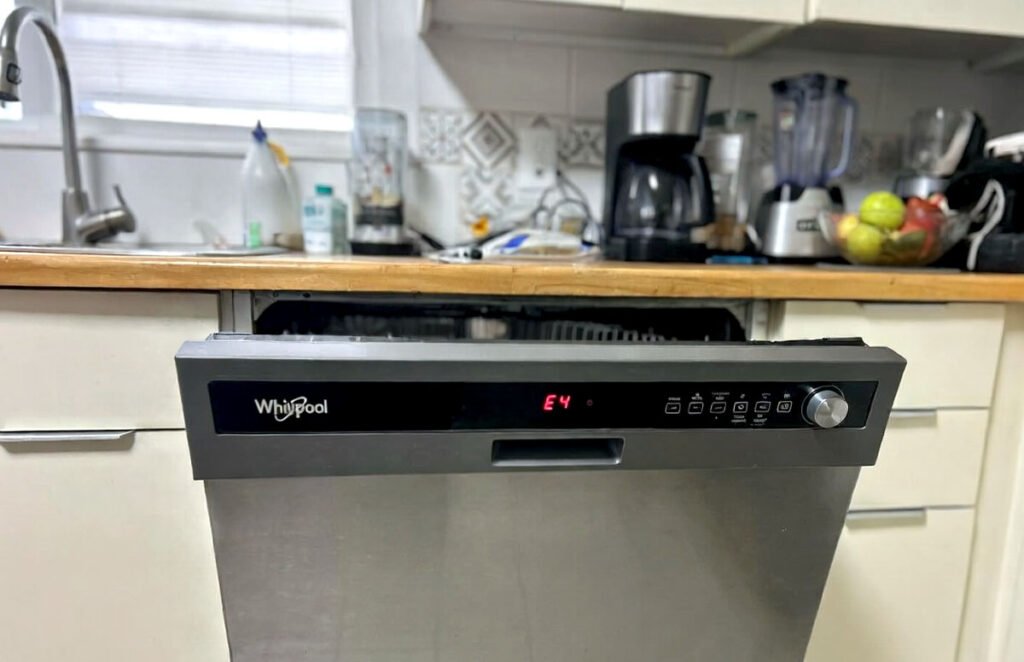
Whirlpool Dishwasher Error Code E4: Fix It Like a Pro
 ByZayyan
The kitchen floor was a literal lake of soapy water when I arrived at a client’s house last Tuesday. Water was pouring out from under the kickplate while the machine just kept humming like nothing was wrong. I had to kill the power at the breaker immediately to stop the flood. In this article, I will show you how to handle this exact mess.
Getting your dishwasher back in action requires focusing on the overflow sensor and the float switch assembly located at the very bottom of the unit. You need to pull the machine out to check for leaks in the heating element seals or a stuck inlet valve that refuses to close. Most of the time, the E4 code means the safety float has been triggered by standing water in the base pan. You must drain that pan, dry the sensor, and find the source of the leak to stop the code from coming back.
What Does the E4 Error Code Mean?
The E4 error code on a Whirlpool machine is a direct warning that the overfill protection system has detected too much water. Inside the base of your dishwasher, there is a shallow plastic tray designed to catch drips before they ruin your hardwood floors. When water fills that tray, a small Styrofoam puck floats up and hits a microswitch. This tells the control board to stop the cycle and run the drain pump indefinitely to prevent a massive flood in your kitchen.
This problem often stems from a mechanical failure rather than a simple software glitch. If your dishwasher continues to fill even when the power is off, your water inlet valve has physically failed and is stuck open. However, if the code pops up during a cycle, it usually means a hose has cracked or a seal has perished. You are looking for a physical puddle of water that is sitting where it absolutely should not be.
Understanding the difference between a “false” E4 and a “real” E4 is the first step in your repair journey. A false code happens if the sensor itself gets gunked up with old soap or if a spider decides to build a nest under the float. A real code means there is actual water touching the basepan sensor. You have to be willing to get on your hands and knees with a flashlight to see what is really happening under the tub.
- A stuck water inlet valve that won’t stop the flow.
- Excessive foam from using the wrong type of detergent.
- A cracked spray arm spraying water directly at the door seal.
- Loose hose clamps on the drain or circulation pump.
- A faulty Styrofoam float assembly or a tripped microswitch.
- Leaking gaskets around the heating element mounting points.
Whirlpool Dishwasher Error Code E4 Repair Guide
Clear the Standing Water
First, you need to get the water out of the bottom of the machine so you can work safely. Grab a shop vac or a large sponge and a bucket to remove every drop from the tub. If the machine is still draining, let it run, but usually, the E4 code locks the controls. You might need to bail it out manually to prevent more leaking while you move the unit.
Once the tub is empty, you must address the hidden water in the base pan. This is the plastic tray located underneath the internal components of the dishwasher. You can access this by removing the lower kickplate using a 1/4 inch nut driver. Use a dry towel to soak up any liquid sitting in that tray until the area is completely bone dry.
If you don’t dry this tray, the error code will never disappear even if you fix the actual leak. The float switch is very sensitive and even a tiny amount of moisture can keep the circuit open. I always use a hairdryer on a low setting to ensure the microswitch and the Styrofoam puck are totally free of humidity. This step is the most common reason why DIY repairs fail.
- Disconnect the power at the breaker before touching any wet components.
- Remove the kickplate with a 1/4 inch nut driver or Phillips head.
- Sponge out all standing water from the bottom plastic drip tray.
- Dry the float switch area thoroughly using a towel or hairdryer.
Inspect the Water Inlet Valve
The water inlet valve is the gateway for all water entering your machine. Over time, calcium and minerals from your tap water can build up inside the valve seat. This prevents the valve from sealing shut completely when the wash cycle ends. If you see water trickling into the tub while the machine is off, this part is definitely your primary suspect.
To find it, look behind the kickplate on the left side where your main water line connects. You will need an adjustable wrench to disconnect the water line and a pair of pliers for the wire harness. Check the small screen inside the valve for debris or sand that might be clogging the mechanism. If the plastic housing looks discolored or cracked, it is time for a replacement.
I recommend replacing the valve entirely rather than trying to clean it. Once the internal spring or diaphragm starts to fail, a leak is inevitable and could cause major floor damage. A new valve is relatively cheap compared to a new kitchen floor. Make sure you use Teflon tape on the brass elbow fitting when you install the new part to ensure a watertight seal.
- Locate the valve on the lower left side behind the kickboard.
- Check for slow leaks while the dishwasher is powered down completely.
- Remove the brass elbow fitting and check for internal debris buildup.
- Replace the valve if the solenoid shows any signs of burning.
Check the Heating Element Seals
Many people overlook the two circular plastic nuts that hold the heating element in place. These are located at the very back of the tub floor. If these nuts loosen over time due to the vibration of the machine, water will drip directly onto the wires. This usually triggers the E4 code because the water falls right into the center of the base tray.
You will need to reach under the machine to feel the underside of the heating element terminals. If they feel wet or slimy, you have found your culprit. Use a pair of large channel lock pliers to gently snug these nuts from the bottom. Be careful not to over-tighten them because the plastic threads can strip or crack if you use too much force.
If tightening doesn’t work, you might need to replace the rubber O-rings. You can buy these at any hardware store, but they must be heat resistant. Pull the element up slightly from inside the tub to inspect the seals for cracks or flattened edges. A fresh set of seals usually solves those mysterious middle of the machine leaks that drive homeowners crazy.
- Feel the terminals under the dishwasher for any signs of moisture.
- Hand tighten the plastic mounting nuts before using any metal tools.
- Inspect the rubber O-rings for signs of dry rot or flattening.
- Ensure the heating element is seated flush against the tub floor.
Examine the Spray Arms
It sounds strange, but a cracked spray arm can cause an E4 error. If the plastic seam on the side of the arm splits, it creates a high pressure jet of water. This jet can hit the door seal at an angle the gasket wasn’t designed to handle. This causes water to bypass the seal and run down into the overflow pan.
Take the lower spray arm out and look closely at the edges where the top and bottom halves are fused. If you see any gaps or “smiling” cracks, the arm is toast. You can also check the spray holes for bits of glass or hard water deposits. Blocked holes increase the internal pressure and make the seams more likely to fail during a heavy cycle.
A quick way to test this is to run a cycle and listen for a “thumping” sound against the door. That is the sound of a rogue water jet hitting the stainless steel. Replacing the spray arm is a ten second job that requires no tools at all. Just spin the mounting nut and pop the new one into the center hub assembly.
- Remove the lower spray arm and check for split plastic seams.
- Clear out any debris from the small water nozzles using a toothpick.
- Ensure the arm spins freely and does not wobble on the hub.
- Watch for water escaping the bottom of the door during operation.
Test the Float Switch
The float switch is the “brain” of the leak detection system. It consists of a Styrofoam disk and a small electrical button. Sometimes the disk gets stuck in the “up” position because of a stray piece of food or a buildup of sticky soda. If the disk can’t drop back down, the machine will think it is flooded forever.
Reach under the dishwasher and flick the Styrofoam piece with your finger. It should click clearly and move up and down without any resistance at all. If it feels crunchy or stuck, clean the area with warm water and a bit of vinegar. You want that movement to be as smooth as silk so it can react to water levels.
If the mechanical part is fine, the electrical switch might have shorted out. You can test this with a multimeter set to the ohms or continuity setting. When you press the switch, the meter should beep or show zero resistance. If the meter stays at “OL” or infinity while the button is pressed, the internal contacts have failed and you need a new switch.
- Flick the Styrofoam puck to ensure it moves freely without sticking.
- Clean any gunk or debris from the plastic guide around the float.
- Use a multimeter to check for electrical continuity on the microswitch.
- Ensure the wire harness is plugged firmly into the switch terminals.
Inspect Hoses and Pump Seals
The final step is a deep dive into the plumbing under the tub. You need to look at the large rubber boots that connect the motor to the sump assembly. These boots can develop pinhole leaks that only spray when the pump is running at full speed. Check the metal tension clamps to make sure they haven’t rusted through or slipped.
Look for white or crusty tracks on the black rubber parts. These “salt trails” are left behind when soapy water evaporates, and they lead you right to the leak. Pay close attention to the drain hose where it connects to the pump. This is a high vibration area where the plastic often rubs against the frame until it wears thin.
If you find a leak at the pump seal, you might need to replace the entire pump and motor assembly. Modern Whirlpool units often have the seal integrated into the housing, making individual seal repairs difficult. However, tightening a loose clamp or replacing a single hose is a very easy and cheap fix. Always double check your work by running a short rinse cycle while watching.
- Search for white “salt trails” that indicate where water has evaporated.
- Check the tension on all metal hose clamps around the main pump.
- Inspect the drain hose for any rub marks or small pinhole punctures.
- Run a test cycle while looking under the unit with a flashlight.
How Can I Prevent the E4 Error From Returning?
Prevention starts with using the right amount of high quality detergent. Many people believe that more soap means cleaner dishes, but in a dishwasher, it just creates excessive suds. These suds can spill over the front of the tub and into the base pan, triggering the E4 sensor. Always use “HE” or High Efficiency pods and never, ever use standard liquid dish soap in the machine.
You should also get into the habit of cleaning your filters at least once a month. When the filters get clogged, the pump has to work much harder to move water out of the tub. This increased pressure can stress the hose connections and cause them to leak prematurely. A clean filter ensures that water flows smoothly and keeps the internal pressure at a safe level for the seals.
Finally, keep an eye on the door gasket and the bottom tub seal. If you see black mold or gunk building up, wipe it away with a damp cloth and some mild soap. A clean seal is a tight seal, and it prevents water from escaping and reaching the sensitive electronics below. Taking five minutes every month to inspect these areas will save you hours of repair work later on.
- Only use high efficiency detergent pods to prevent oversudsing issues.
- Clean the mesh filters regularly to reduce strain on the pump system.
- Wipe down the door gaskets to remove debris that breaks the seal.
- Check the spray arms for clogs that could cause high pressure leaks.
- Inspect the area under the sink for any drain line kinks or blocks.
- Ensure the dishwasher is perfectly level to keep water in the sump.
Final Thoughts
Dealing with a leaking dishwasher is stressful, but the E4 code is actually your friend because it prevents a major flood. By following these steps, you have protected your home and saved yourself a couple hundred bucks on a service call. Most of these fixes just require a little patience and a good flashlight. Now that your machine is dry and happy, go ahead and enjoy a quiet, leak-free kitchen.
| Step Name | Difficulty Level | Parts Needed | Pro Tip |
| Drain Base Pan | Easy | Towel, Shop Vac | Use a hairdryer to dry the sensor faster. |
| Inlet Valve Check | Medium | New Inlet Valve | Use Teflon tape on all brass fittings. |
| Heating Element | Medium | Rubber O-Rings | Don’t over-tighten the plastic nuts. |
| Spray Arm Fix | Easy | New Spray Arm | Check the side seams for hidden cracks. |
Frequently Asked Questions (FAQs)
Is it safe to use the dishwasher while the E4 code is flashing?
No, it is not safe because the E4 code indicates a leak or an overflow condition. Using the machine could lead to significant water damage to your floors and cabinets. The code usually locks the controls and runs the drain pump as a safety measure to prevent further flooding.
Can I reset the error code by just unplugging the machine?
While unplugging the machine for ten minutes might clear the code temporarily, it will return as soon as the sensor detects water again. You must physically dry the base pan and the float switch to resolve the error. A reset is only a temporary fix for a physical problem.
Do I need special tools to fix this Whirlpool error?
You can handle most of these repairs with basic household tools like a 1/4 inch nut driver, a Phillips screwdriver, and pliers. A multimeter is helpful for testing the switch, but it is not strictly necessary for the mechanical fixes. Most Whirlpool parts are designed for easy access from the front.
Is the E4 error caused by a software glitch?
It is very rare for this to be a software issue. The E4 code is tied to a physical float switch that reacts to the presence of water. If the code persists, there is almost certainly moisture in the bottom tray or a mechanical failure in the switch assembly itself.
Can using the wrong soap cause an E4 error?
Yes, using regular dish soap or too much detergent creates a “suds lock” condition. The foam expands and pushes through the air vents or over the tub edge into the drip tray. This triggers the float switch even if there isn’t a mechanical leak in the plumbing.
Do I have to pull the dishwasher out of the cabinet?
For some steps, like checking the drain hose or the motor seals, you will likely need to slide the unit out. Be sure to disconnect the power and water lines first. However, you can access the float switch and the inlet valve just by removing the kickplate.
Can a clogged drain line trigger this specific code?
A clogged drain can cause water to back up into the tub, which might eventually lead to an overflow. If the water level gets high enough to trip the float, the E4 code will appear. Always check your sink’s garbage disposal and the drain hose for any obstructions.
Is it expensive to replace the water inlet valve?
Replacing the valve is relatively inexpensive, usually costing between thirty and sixty dollars for the part. Doing the labor yourself saves you the high cost of a professional technician’s house call. It is one of the most cost-effective repairs you can do on a Whirlpool dishwasher.