As an Amazon Associate, I earn from qualifying purchases at no extra cost to you.
How to Season Your Nonstick Pan: Simple and Easy Steps!
 ByZayyan
Have you ever wondered how to make your nonstick pan last longer? Well, wonder no more! Seasoning your nonstick pan is the key to keeping it in tip-top shape. In this article, we’ll show you exactly what seasoning is and how to do it step by step.
Seasoning might sound like something only chefs do, but it’s actually quite easy. It’s like giving your pan a protective coat to keep it working well for a long time. Whether you’re a cooking novice or a seasoned chef (pun intended!), learning how to season your nonstick pan can make a big difference in your kitchen.

Why Do You Need to Season a Nonstick Pan?
When you cook, seasoning a non-stick pan is like giving it a special hug to make it feel nice and happy. Seasoning means adding a thin layer of oil to the pan and heating it up. This helps to make the surface smoother and helps prevent food from sticking to it.
Here’s why seasoning is important for a non-stick pan:
- Smooth Surface: When you heat up oil in the pan, it fills in the tiny bumps and holes on the surface. This makes the surface smoother, like a slide at the playground. When the surface is smooth, food can glide around easily without getting stuck.
- Non-Stick Power: A well-seasoned non-stick pan is like a superhero against sticking. It creates a barrier between the food and the pan, so they don’t get too clingy with each other. This means you can flip pancakes or stir-fry veggies without worrying about them sticking and making a mess.
- Longevity: Seasoning your non-stick pan can help it last longer. It’s like giving your pan a shield to protect it from wear and tear. When you season it regularly, the layer of oil keeps the pan in good shape, so it stays slick and shiny for a long time.
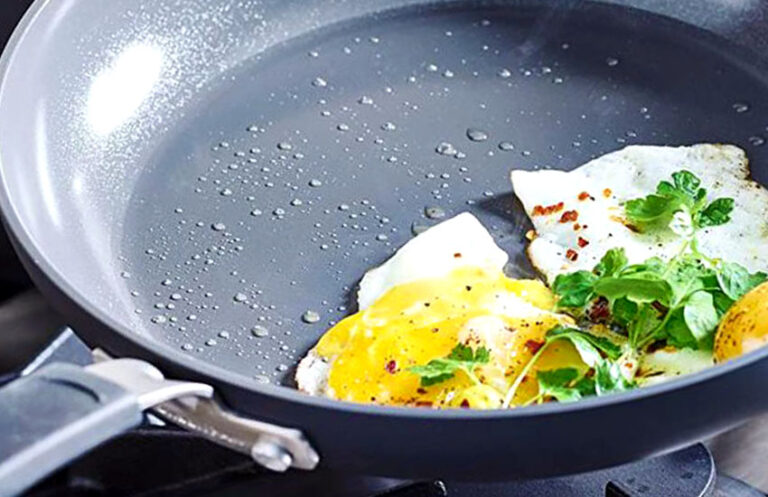
- Even Cooking: Seasoning helps to distribute heat evenly across the surface of the pan. This means your food cooks more evenly too. No more burnt spots or unevenly cooked eggs!
- Easy Cleaning: When your pan is well-seasoned, cleaning up is a breeze. Food slides right off, so you don’t have to scrub and scrub to get it clean. A quick rinse with some warm, soapy water is usually all it takes.
So, seasoning a non-stick pan is like giving it a little love and care to make sure it works its best for you. It’s an easy way to keep your cooking adventures smooth and hassle-free!
Steps to Season Your Nonstick Pan
Seasoning creates a smooth surface on your nonstick pan. It helps prevent food from sticking and makes cleaning up simpler. Plus, it can help extend the life of your pan.
Step 1: Wash Your Pan
Before seasoning, wash your nonstick pan with warm, soapy water. Make sure to remove any dirt or leftover food.
Step 2: Dry Thoroughly
After washing, dry your pan completely with a clean towel. Any water left on the pan can interfere with the seasoning process.
Step 3: Apply Oil
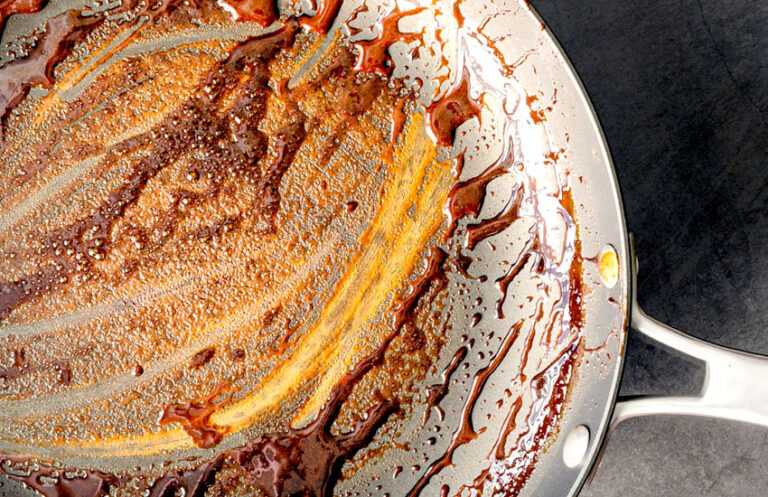
Choose an oil with a high smoke point, like vegetable or canola oil. Put a small amount of oil on a paper towel, then rub it all over the inside of the pan. Make sure to cover every part evenly.
Step 4: Heat the Pan
Place the oiled pan on the stove over medium heat. Let it heat up for a few minutes until you start to see wisps of smoke. This means the oil is ready to bond with the pan.
Step 5: Let it Cool
Turn off the heat and let the pan cool down completely. This allows the oil to form a protective layer on the pan’s surface.
Step 6: Repeat if Necessary
If you notice any uneven spots or areas where the oil didn’t cover, you can repeat the seasoning process. Just make sure to wash and dry the pan again before applying more oil.
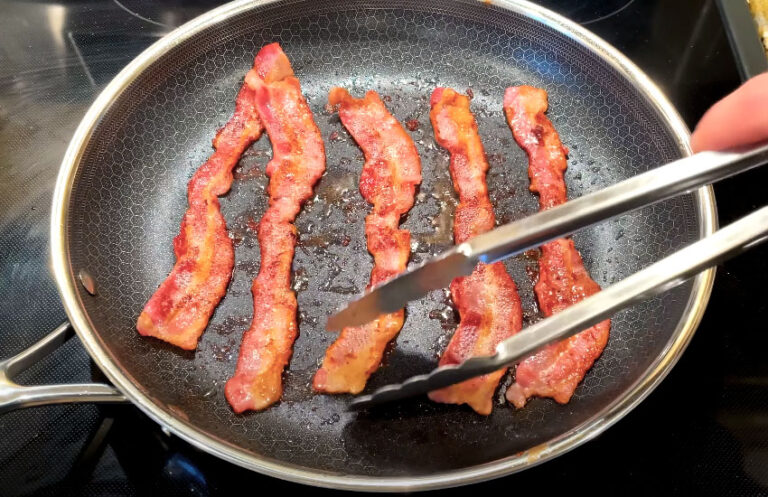
Step 7: Cook with Care
After seasoning, be gentle with your nonstick pan. Avoid using metal utensils that can scratch the surface. Instead, opt for wooden or silicone utensils.
Step 8: Clean Properly
To keep your seasoned pan in good condition, wash it by hand with mild soap and water. Avoid using abrasive cleaners or scrubbers that can damage the seasoning.
Step 9: Re-Season as Needed
Over time, the seasoning on your nonstick pan may wear off. If you start to notice food sticking again, it’s time to re-season. Just follow the same steps to give your pan a fresh coat of protection.
By following these simple steps, you can keep your nonstick pan in top condition and enjoy hassle-free cooking for years to come!
Best Oil for Seasoning Nonstick Pans
Choosing the right oil for seasoning your non-stick pans is super important. It helps create a nice, slippery surface that stops food from sticking. Here are some easy options for you:
- Canola Oil: This oil is great for seasoning because it has a high smoke point, which means it can get really hot without burning. That’s important for making sure your pan gets a good seasoning without leaving behind a burnt smell or taste.
- Vegetable Oil: Just like canola oil, vegetable oil also has a high smoke point, making it a good choice for seasoning non-stick pans. It’s also pretty neutral in flavor, so it won’t leave any weird tastes on your food.
- Grapeseed Oil: Grapeseed oil is another oil with a high smoke point, making it suitable for seasoning. It has a light flavor, so it won’t overpower the taste of your food.
- Avocado Oil: Avocado oil has a very high smoke point and is rich in healthy fats. It’s a great choice for seasoning non-stick pans and adds a subtle buttery flavor to your food.
- Flaxseed Oil: Flaxseed oil is a bit different because it’s rich in omega-3 fatty acids. It has a lower smoke point than the other oils mentioned, so it’s important to use it carefully when seasoning your pans. However, it can create a really durable seasoning layer on your pan if done right.
Remember, when seasoning your non-stick pans, it’s important to apply the oil evenly and then bake the pan in the oven for a while to help the oil bond to the surface. Also, make sure to wipe off any excess oil before baking to avoid a sticky residue. With the right oil and technique, you can keep your non-stick pans in top condition for a long time!
Can You Season Your Nonstick Pan with Olive Oil?
Yes, you can season a nonstick pan with olive oil! Seasoning means making the pan better for cooking by adding a thin layer of oil to it. Nonstick pans usually have a coating that helps food not stick to them, but seasoning can make them even better.
To season your nonstick pan with olive oil, follow these simple steps:
- Clean the Pan: Before seasoning, wash your pan with warm, soapy water and dry it completely. Make sure there’s no dirt or food left on it.
- Apply Olive Oil: Take a paper towel or cloth and put a little bit of olive oil on it. Then, rub the oil all over the inside of the pan. You want a thin, even layer covering the entire surface.
- Heat the Pan: Turn on your stove to a low or medium-low heat setting. Put the oiled pan on the burner and let it warm up for a few minutes. This helps the oil soak into the pan.
- Let It Cool: After heating the pan for a few minutes, turn off the stove and let the pan cool down completely. This allows the oil to settle into the pan and create a nonstick surface.
- Repeat if Needed: You can repeat this process a few times if you want to build up a stronger nonstick layer. Just make sure to let the pan cool down between each seasoning.
By seasoning your nonstick pan with olive oil, you’re helping to create a smoother surface that food is less likely to stick to. It’s a simple way to improve your cooking experience and make your nonstick pan last longer.
Remember, it’s important to use caution when heating the pan and handling hot oil to avoid burns or accidents. Always follow safety guidelines when cooking!
I hope now you know how to make your nonstick pan last longer. Seasoning it is easy and important. Just follow the steps carefully. First, wash and dry the pan. Then, spread oil all over it and heat it up. Let it cool and wipe off any extra oil. Repeat this process a few times. Your pan will be ready for cooking! Enjoy your nonstick cooking adventures!