As an Amazon Associate, I earn from qualifying purchases at no extra cost to you.
Siemens Dishwasher Error Code E19: How to Fix It Fast
 ByZayyan
Last Thanksgiving, my sister’s dishwasher decided to quit right as the pumpkin pie hit the table. We were left with a mountain of greasy plates and a blinking E19 error on her fancy Siemens machine. It felt like the universe was playing a cruel joke on our holiday spirit.
To get your kitchen back in order, you should start by safely disconnecting the power to avoid any nasty shocks. Next, you need to access the heat exchanger on the side of the unit to find the solenoid valve, which is usually the culprit. Carefully swap out the old valve for a new one, ensuring the seals are tight and the wiring is secure. Finally, put everything back together and run a test cycle to confirm the error has vanished for good.
What exactly is the Siemens dishwasher error code E19?
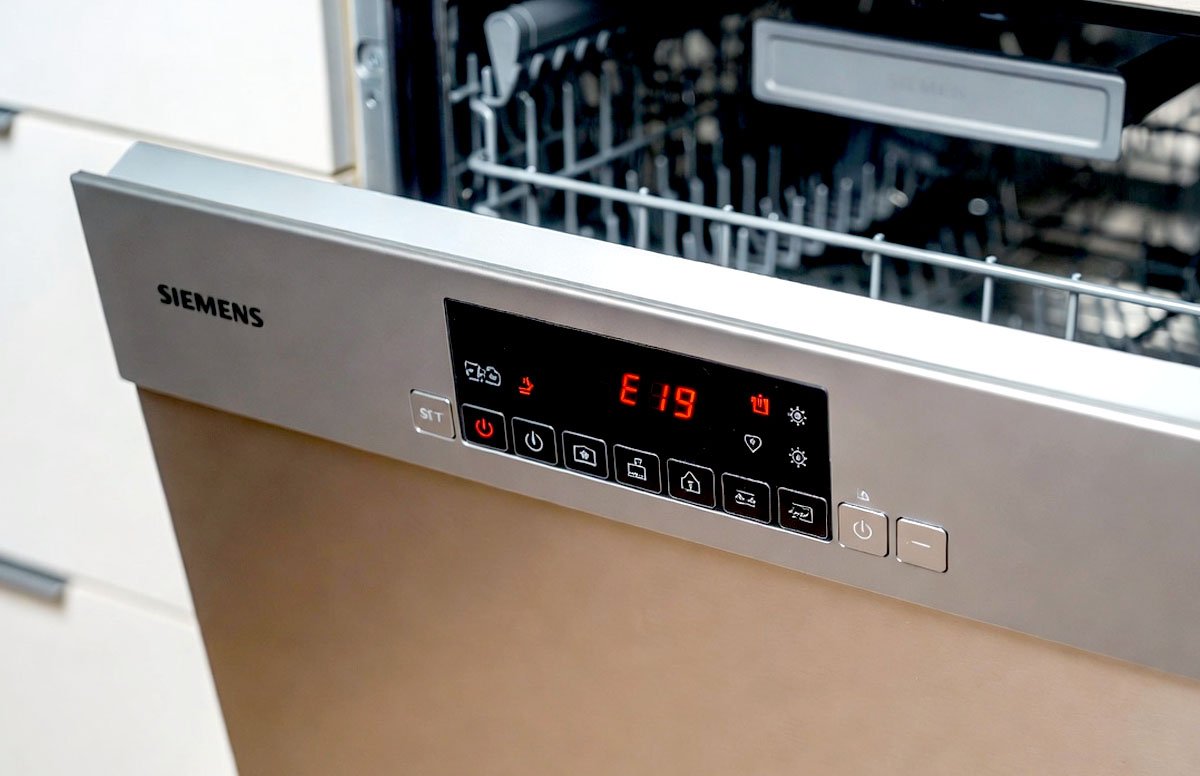
The E19 code is basically your dishwasher screaming for help because its solenoid valve has failed or the heat exchanger has a problem. This valve is a small but mighty component that controls the flow of water into the dispenser system. When it burns out or gets stuck, the control board realizes something is wrong and shuts down the cycle to prevent internal damage.
I have spent two decades looking at these machines, and I can tell you that this specific error is very common in modern, water-efficient models. These units use a heat exchanger to save energy, and the valve attached to it handles a lot of mechanical stress over the years. It is not a sign that your machine is junk, but rather a call for a simple part replacement.
This error usually pops up right at the beginning or the very end of a wash cycle. You might hear a clicking sound followed by a long silence before the dreaded code appears on the display. It can be incredibly frustrating when you just want clean forks, but understanding that it is just a hardware glitch helps take the sting out of the repair.
- The code signifies a fault in the circulating pump or the solenoid valve.
- It often points to a discharge valve failure on the heat exchanger.
- Power surges can occasionally trigger a false E19 reading on the board.
- This error prevents the dishwasher from starting a new water intake sequence.
- You will usually find the problematic valve on the left side of the unit.
- Ignoring the code can lead to potential leaks or electrical shorts over time.
The Ultimate 6 Step Guide to Fixing Your Siemens Dishwasher
Step 1: Safety First and Power Down
First off, you must never work on an appliance that is still plugged into the wall. Water and electricity are a dangerous combination that can lead to serious injury or even a fire if you are not careful. Locate your dishwasher’s power cord and pull it out, or flip the circuit breaker in your home’s main panel to be totally safe.
To make matters worse, some people think just turning the power button off is enough, but that leaves live current inside the machine. You want the unit to be completely dead before you start poking around with a screwdriver. This also gives the onboard computer a chance to reset, which is a nice little bonus during the repair process.
Pull the machine out from under the counter slowly so you do not snag any hoses or scratch your flooring. I always suggest laying down an old towel or a piece of cardboard to protect your kitchen tiles from the heavy metal base. Once you have a clear workspace, you can breathe a sigh of relief because the hardest physical part is done.
- Unplug the unit or turn off the dedicated circuit breaker.
- Turn off the water supply valve located under the kitchen sink.
- Pull the dishwasher out onto a protected floor surface carefully.
- Verify the power is off by trying to light the display.
Step 2: Removing the Side Panels
Accessing the guts of a Siemens dishwasher requires you to remove the outer casing. Most of the important valves and the heat exchanger are tucked away on the left hand side of the machine. You will need a Torx screwdriver, usually a T20 size, to remove the screws holding the metal panel in place.
Be careful as you slide the panel off because the metal edges can be quite sharp. I have seen many DIY enthusiasts end up with a nasty cut because they moved too quickly. Hold the panel firmly and set it aside in a safe place where it won’t get bent or stepped on by curious family members or pets.
Once the panel is gone, you will see a large, flat plastic tank which is the heat exchanger. This part looks like a maze of water channels and is essential for the drying process. Do not be intimidated by the complex look of the interior because we are only looking for one specific small part attached to the bottom.
Take a moment to look for any obvious signs of leaks or burnt wires while you have the machine open. Sometimes an E19 code can be caused by a loose connection rather than a totally dead part. A quick visual inspection can save you a lot of time and money if the fix is just pushing a plug back in.
- Use a T20 Torx driver to remove the side panel screws.
- Lift the panel up and away from the dishwasher frame.
- Locate the large plastic heat exchanger tank on the left side.
- Inspect the area for any visible water damage or loose wires.
Step 3: Locating the Solenoid Valve
Now that the side is open, look at the bottom right corner of the plastic heat exchanger. You will see a small, square component with two wires plugged into it, which is the solenoid valve. This is the piece that usually fails and triggers the E19 error code on your display. It is held in place by a simple locking mechanism.
Before you touch it, take a clear photo of the wiring with your phone. This is a pro tip that helps you remember exactly where the wires go when you install the new part later. It is very easy to forget the orientation once the old valve is sitting on the floor, and a photo is a perfect reference.
The valve is designed to be replaced, so it shouldn’t be too difficult to wiggle free. However, be prepared for a small amount of water to leak out when you remove it. Have a small sponge or another towel ready to soak up any drips before they reach the electrical components at the base of the machine.
Gently unplug the electrical connector by squeezing the plastic tabs. Do not pull on the wires themselves, as you could pull them out of the plastic housing and cause a much bigger headache. Once the wires are free, you are ready to remove the valve from its mounting point on the heat exchanger tank.
- Identify the solenoid valve at the base of the heat exchanger.
- Take a reference photo of the electrical connections and position.
- Carefully disconnect the wiring harness by squeezing the locking tabs.
- Prepare a towel for the small amount of water that will escape.
Step 4: Removing the Faulty Valve
To remove the old valve, you usually need to give it a quarter turn in a counter clockwise direction. Some models might have a small plastic tab you need to press down first to unlock it. Be gentle but firm, as the plastic on the heat exchanger can become brittle over time due to the heat.
If the valve feels stuck, do not force it with heavy pliers. You might crack the main tank, and that is a much more expensive repair than just a simple valve. Wiggle it slightly back and forth to break the seal of the rubber O-ring before giving it that final turn to pull it out.
Once the valve is out, inspect the hole for any debris or mineral buildup. Hard water can sometimes cause grit to get stuck in the opening, which might have contributed to the failure in the first place. Cleaning the area with a damp cloth ensures the new valve will have a perfect, watertight seal.
Set the old part aside and compare it to your new replacement part. Ensure they look identical and that the electrical pins are the same size and shape. Using the correct OEM part is vital for Siemens dishwashers because the control board is very sensitive to the electrical resistance of the components you install.
- Turn the valve counter clockwise to unlock it from the tank.
- Press any locking tabs gently to avoid snapping the plastic.
- Clean the mounting hole of any scale or leftover debris.
- Compare the old valve with the new one to ensure compatibility.
Step 5: Installing the New Component
Take your new solenoid valve and lightly lubricate the rubber seal with a tiny bit of water or dishwasher safe lubricant. This helps it slide into place without pinching the gasket, which is the main cause of leaks after a repair. Align the tabs on the valve with the slots on the heat exchanger tank.
Push the valve in firmly and turn it clockwise until you feel it click or lock into position. It should feel solid and not wiggle once it is seated correctly. If it feels loose, you might not have turned it far enough, so give it another gentle check to make sure it is fully home.
Now, refer back to that photo you took earlier and reconnect the electrical wires. They should click into place with a satisfying snap. Make sure the wires are tucked away and not touching any sharp metal edges or vibrating parts of the machine that could wear through the insulation over the next few months.
This is the point where you should double check everything you have done so far. A quick once over ensures that no tools were left inside the machine and that all connections are tight. It is much easier to fix a small mistake now than it is after you have put the side panel back on.
- Lubricate the O-ring seal to prevent leaks during the installation.
- Insert the valve and turn it clockwise until it locks securely.
- Reconnect the wiring harness based on your reference photo.
- Ensure the valve is seated flush against the plastic tank wall.
Step 6: Testing and Reassembly
Before you put the side panel back on, you should run a quick test. Turn the water supply back on and plug the dishwasher in. Select a short rinse cycle and watch the new valve carefully. You are looking for any signs of water dripping or spraying from the connection point you just worked on.
If the machine fills up and the E19 code does not appear, you have successfully fixed the problem. It is a great feeling to see that timer counting down instead of a red error light. Watch it for at least five minutes to be absolutely sure that the pressure hasn’t caused a slow leak.
Once you are confident the repair is solid, turn off the cycle and unplug the machine one last time. Carefully slide the side panel back into place, making sure it aligns with the frame properly. Replace the Torx screws and tighten them just enough to hold the panel firm without stripping the threads in the plastic.
Slide the dishwasher back into its original spot under the counter. Be careful not to kink the drain hose or the water line as you push it back. Reattach any mounting screws to the cabinetry, plug it in, and enjoy the peace of mind that comes with a job well done and a working kitchen.
- Run a test cycle to check for leaks and error codes.
- Verify that the dishwasher fills and drains without any issues.
- Unplug the unit and reinstall the metal side panel carefully.
- Push the unit back into place and secure it to the counter.
Is it worth repairing a Siemens dishwasher yourself?
Deciding whether to tackle this yourself depends on your comfort level with basic tools and a bit of patience. Most people find that replacing a solenoid valve is a very manageable task that saves a significant amount of money compared to calling a professional technician. A repair bill from a pro can easily reach hundreds of dollars, while the part itself is quite affordable.
I always tell my friends that if they can put together IKEA furniture, they can probably fix an E19 error. The design of Siemens machines is actually quite logical and user friendly once you get the side panel off. You don’t need specialized diagnostic equipment to swap a valve, just a screwdriver and a little bit of confidence in your hands.
To make matters worse, waiting for a repairman can take days or even weeks depending on the season. Fixing it yourself means you get your kitchen back in order tonight rather than washing dishes in the sink for the next fortnight. It is an empowering feeling to master your own home appliances and keep things running smoothly without outside help.
- DIY repair saves you a hefty service call fee and labor costs.
- The solenoid valve is a relatively inexpensive part to purchase online.
- Most repairs take less than an hour from start to finish.
- You gain a better understanding of how your home appliances function.
- No need to wait for a technician’s schedule to open up.
- The tools required are basic and found in most home toolkits.
How can I prevent the E19 error from coming back?
While some part failures are just down to bad luck or age, there are a few things you can do to extend the life of your dishwasher. Using a high quality salt in your water softener system is a huge factor for those living in hard water areas. Limescale is the enemy of solenoid valves and can cause them to seize up much earlier than they should.
Interestingly, running a cleaning cycle with a specialized dishwasher descaler every few months can work wonders. This keeps the internal channels of the heat exchanger clear and reduces the strain on the valves. It is a small maintenance step that keeps the water flowing freely and the sensors happy, which prevents those annoying error codes from popping up.
You should also check your home’s water pressure if you find you are replacing valves frequently. Excessive pressure can put too much stress on the internal seals and solenoids of any appliance. Installing a pressure reducing valve at your main line can protect your dishwasher, washing machine, and water heater all at once, saving you thousands in the long run.
- Use high quality dishwasher salt to prevent limescale buildup.
- Run a dedicated machine cleaning cycle every three months regularly.
- Check that your home water pressure is within the standard range.
- Clean the inlet filter located in the water supply hose occasionally.
- Avoid using excessive amounts of detergent which can cause sudsing.
- Ensure the dishwasher is level to prevent drainage and fill issues.
Final Thoughts
Fixing a Siemens dishwasher error code E19 might seem scary at first, but it is totally doable for a regular person. You just saved yourself a lot of money and the headache of waiting for a repair tech. Keep your machine clean and treat it well, and it will return the favor by keeping your dishes sparkling. You have got this, so go ahead and get that kitchen back in action today.
| Step Name | Difficulty Level | Parts Needed | Pro Tip |
| Preparation | Easy | None | Take photos of wires |
| Accessing | Medium | Torx T20 | Watch for sharp edges |
| Part Removal | Medium | Towel | Twist gently to unlock |
| Installation | Medium | New Valve | Wet the seal first |
Frequently Asked Questions (FAQs)
Is it dangerous to fix the dishwasher myself?
It is only dangerous if you forget to disconnect the power and water. As long as the machine is unplugged and the water is off, the risks are very low. Always wear gloves if you are worried about sharp metal edges inside the frame, and take your time with each step.
Can a power surge cause an E19 error?
Yes, sometimes a spike in electricity can confuse the control board and trigger a false E19 code. Before buying parts, try unplugging the dishwasher for ten minutes to see if the system resets. If the code comes back immediately after a reset, you definitely have a hardware failure to address.
Do I need special tools for this repair?
You mostly need a T20 Torx screwdriver, which is common for European appliances like Siemens and Bosch. A pair of pliers might help with stubborn electrical connectors, and a towel is essential for drips. You do not need any expensive diagnostic computers or heavy machinery to swap out the solenoid valve.
Is the E19 code the same for Bosch dishwashers?
Yes, because Siemens and Bosch are part of the same parent company, they share many internal parts and error codes. The repair process for an E19 error on a Bosch machine is almost identical to the steps outlined here. You can often use the same replacement parts for both brands.
Can I just clean the valve instead of replacing it?
While you can try to clean out debris or limescale, most solenoid valves fail because the internal electrical coil has burnt out. Cleaning the plastic won’t fix a dead motor or a broken spring inside. Given the low cost of a new part, replacement is usually the most reliable long term fix.
Do I have to remove the whole heat exchanger?
In most cases, you do not need to remove the entire plastic tank to get to the valve. The solenoid is designed to be accessible from the bottom edge. Removing the whole tank is a much bigger job involving many seals and hoses, so avoid doing that unless the tank itself is leaking.
How do I know which valve to buy?
You should find the E-Nr model number on the top or side of the dishwasher door. Use this number to search for “Siemens dishwasher solenoid valve” on a reputable appliance parts website. Buying an official OEM part ensures that the electrical resistance matches what your specific control board expects to see.
Is a leak responsible for the E19 code?
While a leak can cause many different codes, E19 is specifically focused on the electrical circuit of the valves or the pump. However, water dripping onto the wiring can cause a short that triggers this code. It is always a good idea to dry everything out thoroughly if you find water in the base.