As an Amazon Associate, I earn from qualifying purchases at no extra cost to you.
Siemens Dishwasher Error Code E15: Fix It Fast Like a Pro
 ByZayyan
I was right in the middle of hosting a big dinner party when my own dishwasher decided to throw a tantrum. Just as I served the dessert, I noticed a tiny puddle creeping across my kitchen tile. It felt like a total disaster because the machine just started beeping at me incessantly.
Getting your machine back on track requires a steady hand and some patience as you address the leak. First, you need to tilt the unit back at a forty five degree angle to drain the water from the base pan. After the excess water flows out, you should wipe the area dry and check the internal seals or the float switch for any debris. Finally, reset the control panel to clear the error and run a test cycle to ensure the leak is completely gone.
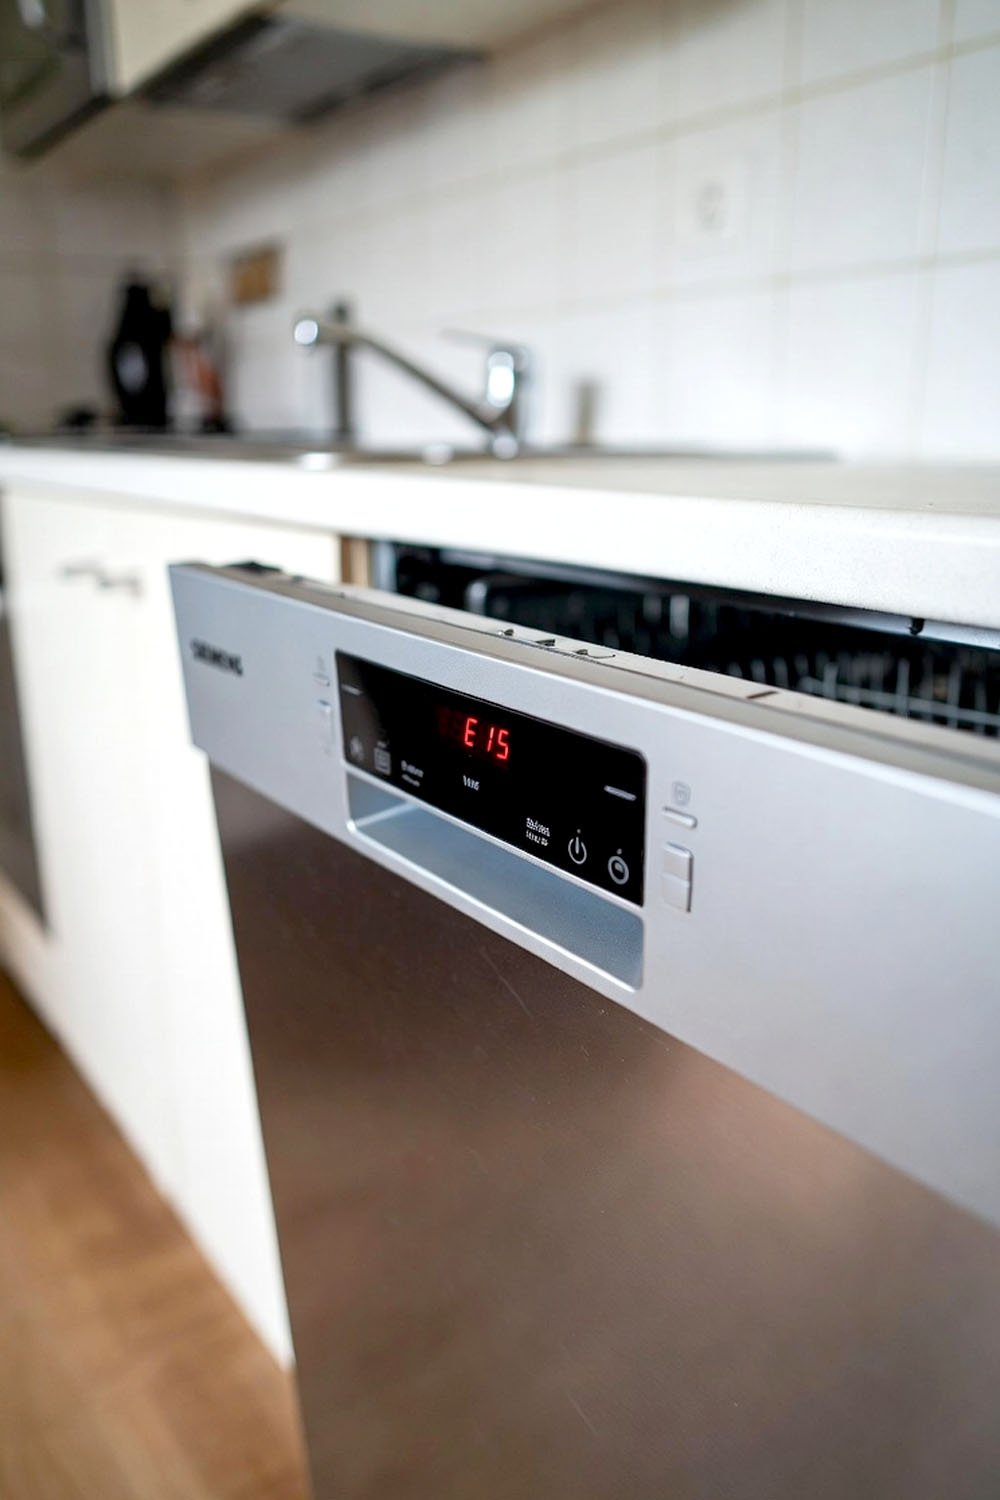
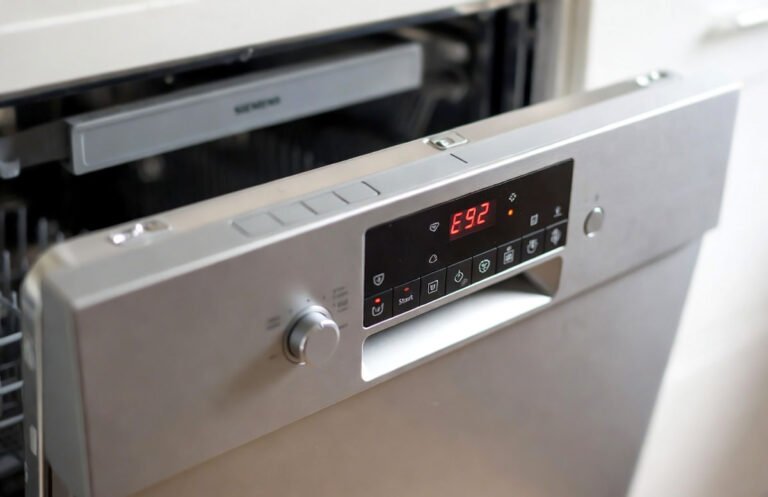
Why Does My Siemens Dishwasher Show the e15 Error Code?
The e15 code is basically your dishwasher telling you that it has detected water where it should not be. Inside the bottom of the machine, there is a safety tray equipped with a small styrofoam float switch. When water leaks into this tray, the float rises and triggers a sensor that shuts everything down to prevent a flood. It is a protective measure designed to save your kitchen floors from total water destruction.
You might be dealing with a simple case of oversudsing or a more serious hardware failure like a cracked spray arm. Sometimes, the vibration of the machine causes a hose to wiggle loose over time. If the water reaches that bottom tray, the system will refuse to start until that area is bone dry. It is a common headache for many homeowners but usually implies a fixable leak is hiding somewhere inside.
- Check for excess soap suds in the tub.
- Inspect the door gasket for any visible tears.
- Look at the spray arms for small cracks.
- Monitor the water inlet valve for slow drips.
- Examine the sump basin for any loose screws.
- Ensure the drain hose is not kinked or blocked.
How to Fix It Like a Pro: My Step by Step Guide
Step 1: Safety First and Power Down
Before you even think about touching a tool, you must disconnect the power to stay safe. Reach under the sink or behind the unit to pull the plug out of the wall. If your dishwasher is hardwired, go to your breaker box and flip the switch to the off position. Safety is the most important part of any repair job when water and electricity are both involved.
Wait at least five minutes after unplugging the machine to allow the internal capacitors to discharge fully. This little bit of patience ensures that you will not get a nasty surprise when you start moving things around. I always keep a dry towel nearby just in case I encounter a stray puddle during the process. Working in a dry environment is the best way to keep your tools and yourself protected.
Clear out the area around the dishwasher so you have plenty of room to move. You might need to pull the machine out from the cabinets just a little bit to get a good angle. Make sure you have a flashlight handy so you can see into the dark corners of the base. Having a clean workspace makes the entire repair feel much less stressful and more organized for you.
Once the power is confirmed off, you can move on to the actual mechanical work. Double check that the water supply valve is also turned off to prevent any new leaks from starting while you work.
- Unplug the power cord or flip the breaker.
- Turn off the water supply valve under the sink.
- Clear the floor space for easy movement.
- Wait for the internal electronics to discharge.
Step 2: Clear the Water from the Base
To get the error code to disappear, you have to remove the water sitting in the bottom tray. The easiest way to do this without taking the whole machine apart is the tilt method. Gently pull the dishwasher out about halfway and tilt it backward at a forty five degree angle. You will need a shallow pan or some heavy towels to catch the water that spills out.
Let the water drain for a few minutes until the dripping stops completely. This action allows the styrofoam float to drop back down to its original resting position. When the float is down, the sensor tells the computer that the leak has been cleared. It is a simple physical fix that works for many minor overflow issues that occur during a heavy wash.
Be very careful not to tip the machine too far or too fast because you could strain the hoses. Having a friend help you hold the weight makes this part much easier on your back. If the dishwasher is heavy, just take your time and move in small increments. Once the water is out, the machine will be much lighter and easier to handle for the next steps.
- Tilt the dishwasher back at a forty degree angle.
- Catch the escaping water with a towel or pan.
- Wait for the internal float switch to drop down.
- Dry the remaining moisture with a cool hairdryer.
Step 3: Inspect the Sump Basin Seal
The sump basin is the area where the water drains, and it often has a large rubber seal. Over time, this seal can perish or become loose due to the heat and chemicals in the detergent. Check the screws around the basin to see if they have vibrated loose during the spin cycles. Tightening these screws is often all it takes to stop a persistent and annoying leak.
Look for any signs of food debris or gunk that might be pushing the seal out of place. Even a small piece of a broken glass can wedge itself in there and create a gap. I usually take a soft brush and clean the entire perimeter to ensure a perfect fit. A clean seal is a happy seal that will keep the water inside where it belongs.
If the seal looks flattened or cracked, you might need to order a replacement part from a supplier. It is a cheap part that can save you from a very expensive floor repair later. Installing a new seal is a straightforward task that most people can do with a basic screwdriver. Just make sure the new one sits flush against the plastic housing for a tight grip.
I always recommend adding a bit of silicone lubricant if the seal seems dry but still intact. This helps it maintain flexibility against the constant temperature changes of the wash cycles. Once you are sure the basin is secure, you can feel confident that the main source of leaks is handled. Tighten everything down firmly but be careful not to crack the plastic by over torquing.
- Check the screws around the sump basin area.
- Clean out any food debris near the rubber seal.
- Look for cracks or flattening in the gasket.
- Apply silicone lubricant to keep the rubber flexible.
Step 4: Examine the Spray Arms for Cracks
Spray arms are often made of two plastic halves that are glued together at the factory. Under high pressure, these seams can sometimes split apart and cause water to spray directly at the door. This creates a wave of water that bypasses the normal drainage system and lands in the base tray. It is a sneaky cause of the e15 error that many people often overlook.
Take both the upper and lower spray arms out of the machine to look at them closely. Run your finger along the edges to feel for any rough spots or visible gaps in the plastic. If you see a split, water is likely jetting out in the wrong direction during the cycle. This rogue spray is powerful enough to overcome the door seals and cause a mess.
You should also check the tiny holes in the spray arms for any blockages like toothpicks or seeds. When holes are blocked, the internal pressure increases and puts extra stress on the plastic seams. Cleaning these out with a small needle can restore the proper spray pattern and reduce the risk of leaks. It also helps your dishes get much cleaner than they were before.
If you find a crack, the best solution is to simply buy a brand new spray arm. They are relatively inexpensive and very easy to click back into place without needing any special tools. Do not try to glue them back together because the heat of the water will melt most adhesives. A fresh part is the only way to guarantee a leak free performance for the future.
- Remove the spray arms and check the side seams.
- Look for splits that allow water to spray sideways.
- Clear out any blockages in the small spray holes.
- Replace any cracked arms with genuine factory parts.
Step 5: Verify the Water Inlet Valve
The water inlet valve is the component that allows fresh water to enter your dishwasher. If this valve gets stuck partially open, it can slowly leak water into the machine even when it is off. Eventually, this extra water overflows into the safety tray and triggers the e15 error code. It is a common problem in areas with hard water or old pipes.
To check this, look at the bottom of the valve for any signs of white crusty deposits or rust. These are clear indicators that water has been seeping out of the connection points over time. You should also listen for a faint humming or dripping sound when the machine is supposed to be silent. A failing valve is a ticking time bomb for your kitchen floors and needs attention.
Replacing an inlet valve is a bit more technical but still very doable for a handy person. You will need to disconnect the water line and the electrical harness attached to the component. Make sure you have a bucket ready to catch the small amount of water left in the hose. Once the old valve is out, the new one should slide right into the bracket.
Always use a bit of plumber tape on the threaded connections to ensure a watertight fit. Tighten the fittings securely but avoid using too much force which could strip the plastic threads. Once the new valve is installed, you have eliminated one of the most common mechanical failures. This part of the repair gives you great peace of mind for the long term.
- Inspect the valve for rust or mineral buildup.
- Listen for dripping sounds when the machine is off.
- Disconnect the water line and electrical harness carefully.
- Use plumber tape on threads for a better seal.
Step 6: Test the System and Reassemble
Now that you have cleaned the base and checked the components, it is time to put it back. Carefully slide the dishwasher back into its cabinet space, making sure no hoses are pinched or kinked. Plug the power cord back in and turn the water supply valve to the open position. It is always a bit nerve wracking the first time you turn it back on.
Run a short rinse cycle while keeping a close eye on the floor and the bottom panel. Use a flashlight to peek under the machine to ensure everything remains dry during the water fill. If the e15 code does not reappear, you have successfully fixed the problem like a real pro. It feels great to see the timer counting down instead of a blinking error message.
If you notice even a tiny drop of water, stop the cycle immediately and recheck your connections. It is much better to find a small leak now than a huge puddle later tonight. Most of the time, a second check reveals a loose hose clamp or a slightly misaligned seal. Persistence is the key to a perfect repair job that lasts for many years.
Finally, give your dishwasher a nice cleaning with a specialized descaler to remove any lingering grime. This helps the new seals and parts settle in and ensures the sensors work accurately. You have saved yourself a couple hundred dollars in repair fees and learned a new skill today. Now you can go back to enjoying your clean kitchen without any annoying beeping sounds.
- Slide the unit back and check for kinked hoses.
- Run a short test cycle to monitor for leaks.
- Use a flashlight to inspect the base during operation.
- Clean the interior to maintain the health of sensors.
How Can I Prevent This Error Code from Coming Back?
Prevention is always better than spending an afternoon with your head inside a dishwasher. The best thing you can do is avoid using too much detergent, especially the liquid kind that creates lots of foam. Excess suds can easily spill over the internal baffles and land directly in the safety tray. Stick to high quality pods that are designed for your specific Siemens model to keep the bubbles under control.
Another great habit is to check the filters at the bottom of the tub at least once a week. When the filter is clogged with food, the water cannot drain fast enough and might splash into places it should not go. It only takes a minute to rinse the filter under the faucet and it makes a huge difference. Keeping the drainage path clear reduces the internal pressure on the seals and hoses.
Finally, make sure you are loading your dishes correctly so they do not block the spray arms. If a tall plate prevents an arm from spinning, the water pressure builds up in one spot and causes leaks. Periodically inspect the door gasket for any signs of wear or trapped food particles. A clean and clear machine is far less likely to throw an error code during a heavy wash cycle.
- Use the correct amount of high quality detergent.
- Clean the drain filter every single week.
- Ensure spray arms can spin freely after loading.
- Wipe down the door seal to remove food bits.
- Avoid using regular dish soap in the machine.
- Check the drain hose for clogs every few months.
Final Thoughts
Dealing with a Siemens dishwasher error code e15 is definitely annoying, but it is not the end of the world. By following these steps, you have taken control of the situation and protected your home from water damage. You should feel proud of your DIY spirit and the money you just saved. Keep your machine clean and maintained, and it will serve you faithfully for many more dinner parties to come.
| Step Name | Difficulty Level | Parts Needed | Pro Tip |
| Powering Down | Easy | None | Check the breaker twice. |
| Tilting the Unit | Medium | Towels | Have a friend help you. |
| Sealing the Sump | Medium | Screwdriver | Do not over tighten screws. |
| Checking Arms | Easy | New Spray Arm | Use a needle for clogs. |
Frequently Asked Questions (FAQs)
Is it safe to use my dishwasher while the e15 code is blinking?
No, it is definitely not safe to keep running the machine when this code appears. The error is a safety feature that tells you there is a leak in the base tray. If you keep trying to run it, you could cause an electrical short or ruin your kitchen flooring. It is best to address the water immediately before trying another cycle.
Can I fix the e15 error without pulling the machine out?
Sometimes you can fix it by just removing the bottom kick plate and using a sponge to soak up the water. However, if the leak is further back, you will likely need to tilt the machine to get all the moisture out. Pulling it out gives you a much better view of what is actually causing the problem.
Do I need to buy a new dishwasher if this code keeps happening?
Usually, you do not need a whole new machine just because of an e15 code. It is almost always caused by a minor leak or a worn out seal that is easy to replace. Even if the repair seems daunting, it is much cheaper than buying a brand new Siemens unit. Most machines have many years of life left after a seal fix.
Is it normal for some water to be in the bottom tray?
No, the safety tray at the very bottom should be completely dry at all times. If there is water there, it means a seal has failed or the machine has overfilled at some point. Even a small amount of moisture can trigger the float switch and stop the cycle. You should always investigate the source if you find any wetness there.
Can using too much soap cause the e15 error?
Yes, using too much detergent is a very common cause for this specific error code. The excess suds can escape the main tub and drip down into the base pan where the sensor lives. If you see foam inside the machine, you likely just need to dry the base and use less soap next time. Switch to tablets to avoid this.
Do I need special tools to fix this error?
Most of the time, you only need a standard screwdriver and some old towels to handle the job. If you need to replace a valve, a pair of pliers might be helpful for the hose clamps. It is a very accessible repair for someone who does not have a massive toolbox at home. Just take your time with it.
Is it possible the sensor itself is broken?
While it is possible for a sensor to fail, it is much more likely that there is actual water in the tray. The float switches are very simple mechanical devices that rarely break on their own. Always assume there is a real leak first before you think about replacing the electronic sensors. A dry tray is the best test for a sensor.
Can a clogged sink drain cause the e15 code?
Yes, if your kitchen sink is backed up, the dishwasher might not be able to pump the water out effectively. This back pressure can cause leaks at the hose connections or even force water back into the base. Always make sure your sink is draining well before you start taking the dishwasher apart. A clear drain path is vital.