As an Amazon Associate, I earn from qualifying purchases at no extra cost to you.
Top Load Washing Machine Not Turning on (Your Machine Dead?)
 ByZayyan
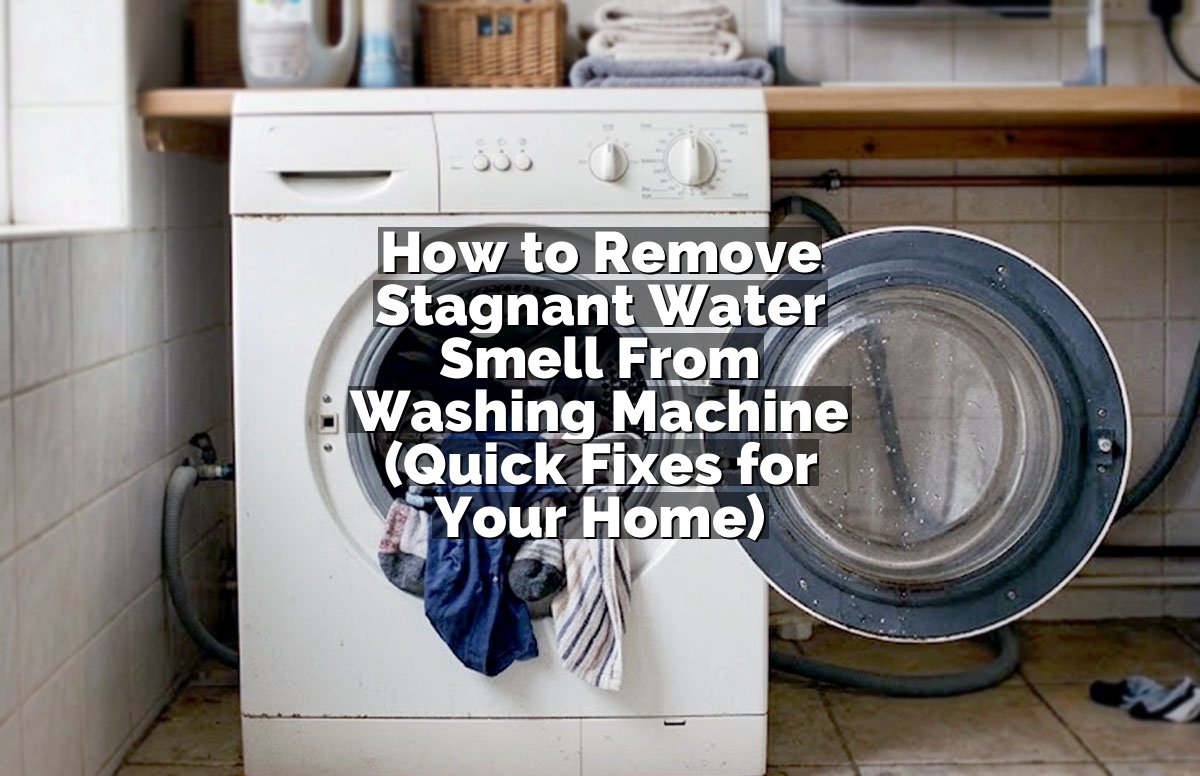
It’s a horrible feeling when you toss your laundry in, hit the start button, and nothing happens. Your top load washing machine is completely dead, no lights, no hum, not a single sign of life. You’ve probably got a pile of dirty clothes growing, and a real need to get this fixed. This guide will help you figure out why your washer won’t turn on and what you can do about it. I will show you the most common issues and how to solve them.
If your top load washing machine won’t turn on, the first step is always to check the power source. Make sure the machine is plugged in securely and that the circuit breaker hasn’t tripped. Sometimes, a simple reset of the breaker can bring your washer back to life. If power isn’t the issue, you’ll need to look at other common problems, which we’ll cover in detail, helping you get your laundry routine back on track quickly.
Why Your Washer Won’t Start
That moment of silence when your washing machine should be churning is incredibly frustrating, especially when you’re in the middle of a busy day. Understanding why your top load washer decided to quit on you is the first step toward fixing it. This often comes down to a few key components failing or simple electrical issues that are easy to overlook.
Power Cord Issues
The power cord is how your washer gets juice. If it’s damaged, frayed, or loose, your machine won’t get the power it needs. You might see frayed wires near the plug or the cord could be yanked out of the wall. It’s a common problem that stops your machine dead.
Check the cord where it plugs into the wall outlet first. Make sure it’s pushed in all the way. You can also inspect the cord itself for any cuts or damage. If you find anything that looks bad, like a torn rubber casing, it’s safer to replace the cord or call a pro.
Your outlet should also provide power. Test it with another small appliance, like a lamp or a phone charger. If that appliance doesn’t work either, you’ve got an outlet problem, not a washer problem, and you need to check your home’s wiring.
Tripped Circuit Breaker
Your washing machine uses a good amount of power, and sometimes it can draw too much, causing the circuit breaker in your home’s electrical panel to trip. You might hear a click from the panel, or the breaker switch will be in the off position, or halfway between on and off. This breaker tripped unexpectedly is a common reason for no power.
Go to your home’s electrical panel and find the breaker labeled for your laundry area or washing machine. If it’s tripped, flip it completely off, then back on again. Sometimes, you’ll need to do this firmly to reset it properly.
If the breaker trips again right after you reset it, there might be a short in the washing machine itself or the wiring. This is a sign you need a technician to look at it. Don’t keep resetting a breaker that keeps tripping, as it can be a fire hazard.
Loose Lid Switch
The lid switch is a safety feature that tells the machine when the lid is closed. If this switch is faulty or disconnected, your machine won’t start, thinking the lid is still open. You might notice that the machine starts fine when you press the lid down but won’t run otherwise. This is a classic lid switch symptom.
You can usually find the lid switch near the door hinge area. Sometimes, you’ll need to remove a small panel to get to it. Inspect the wires connected to the switch for any signs of damage or disconnection. If a wire is loose, try pushing it back on firmly.
If the switch itself looks broken or corroded, it probably needs replacing. These are usually not too expensive, and you can often find a replacement online or at an appliance parts store. Make sure you get the exact part number for your specific washer model.
Control Panel Issues
The control panel is the brain of your washer. If it’s not getting power, or if there’s an internal fault, your machine simply won’t respond. You might see no lights on the control panel at all, or the screen might be blank. This is a tough one, as control panels can be expensive.
First, check that the power cord is secure, as we discussed. If the cord is fine, try unplugging the machine for about five minutes, then plugging it back in. This can sometimes reset the electronic control board. Your washer might just need a simple reboot.
If that doesn’t work, the control panel itself might be bad. Sometimes water or cleaning solutions can get into the panel and cause damage. If you’ve tried everything else and your washer still has no power, this is likely your culprit.
Drive Motor Problems
The drive motor is what actually spins the drum and agitator. If this motor fails, the machine won’t do anything, not even hum. You might hear a faint click when you try to start it, but then silence. This motor failure is a big problem.
This is a more complex repair, often requiring you to remove the machine’s cabinet to access the motor. You’ll need to disconnect wiring and possibly some belts or pulleys. If you’re not comfortable with this kind of work, it’s best to call a professional.
If you do decide to tackle it, make sure you disconnect the power first. The motor is usually located at the bottom of the machine. You’ll need to identify the specific part number for your model and order a replacement.
Drive Belt Wear
On some older top-load washers, a worn or broken drive belt can prevent the motor from turning the drum. You might notice a burning smell like rubber if the belt is slipping or has recently broken. This is a common failure point for many appliances.
You’ll usually need to tilt the machine back or remove a front or back panel to see the drive belt. It connects the motor to the drum or transmission. Check if it’s cracked, frayed, or feels loose. A belt that’s too loose to grip the pulleys needs replacing.
Replacing a drive belt is usually a straightforward repair. You just need to find the right belt for your model and carefully slip it over the motor pulley and the larger drum pulley. Make sure it’s seated correctly before you reassemble.
Here’s a quick rundown for you: check power, then the breaker, then the lid switch. If those are good, it’s likely a control panel or motor issue. Trust your gut; if you’re not comfortable, get help.
Fixing a Washer That Won’t Turn On
When your top load washer just won’t start, it feels like a huge roadblock. You need to get it running again. The good news is, many of the reasons a washer won’t power on are simple fixes you can do yourself. We’ll walk through the common solutions, starting with the easiest ones.
Check the Outlet First
This sounds basic, but you’d be surprised how often the outlet is the simple problem. Your washer needs a good, steady flow of electricity to kick into gear. If the outlet itself is faulty, or if it’s not providing enough power, your machine just won’t turn on, no matter what else is right. Your entire laundry setup depends on this.
Try plugging a different appliance, like a hair dryer or a small fan, into the same outlet. If that appliance doesn’t work either, then the outlet is the problem, not your washer. This means you need to check your home’s circuit breaker or call an electrician.
If the outlet works fine with another device, then you know the power source to that spot is good. This gives you confidence to move on to checking the washer’s power cord and plug. Make sure your washer’s plug is firmly seated in the outlet.
Secure the Power Cord
Sometimes the power cord can work itself loose from the back of the machine, especially if the washer has been moved or vibrated heavily. You’ll need to unplug the washer from the wall outlet before you can inspect the back. Make sure your power cord is not frayed or damaged.
Look for the power cord where it enters the back of the washing machine. There might be a strain relief clamp holding it in place. Ensure the cord is pushed all the way in and that it feels secure. If the wires inside the cord look damaged, replace the entire cord.
If the cord itself is fine, and securely attached, then you need to continue troubleshooting. Your washer’s power connection is just one piece of the puzzle for getting it to start. You’ve confirmed this part is okay, so let’s move to the next step.
Reset the Washer
Many modern washing machines have a digital control board that can sometimes glitch, just like a computer. A simple reset procedure can often clear these glitches and get your machine working again. This involves cutting power to the washer for a few minutes. Your machine could just be confused.
Unplug your washing machine from the wall outlet. Wait for at least five minutes. This allows any residual power in the system to dissipate. You’re essentially giving the machine’s computer a chance to clear its memory.
After waiting, plug the washer back into the outlet. Try turning it on again. If it powers up, great! If not, you’ll need to investigate more complex issues. Your washer might just have needed a moment to reset itself.
Test the Door Latch
The door latch, or lid switch on a top loader, is a critical safety component. If the machine thinks the lid isn’t closed, it won’t start the cycle. You can test this by gently pushing down on the lid while you try to start the machine. If it works then, your latch is the problem. You need to fix this door latch not engaging.
You might be able to clean the latch mechanism if it’s just dirty or sticking. Sometimes, lint and residue can prevent it from making proper contact. Use a damp cloth and a little mild soap to clean the striker plate on the lid and the receiver on the machine.
If cleaning doesn’t help, the latch mechanism or the switch itself may be broken. Inspect the wiring connected to the switch. If any wires are loose or corroded, reattach or clean them. Replacing the latch is usually a relatively simple repair.
Replace the Main Control Board
If all else fails, the main control board might be the issue. This is the electronic brain of your washer, and if it’s faulty, nothing will work. It’s often the most expensive part to replace, so you want to be sure this is the problem before you buy one. Your machine might have a burnt smell from the control panel.
You will likely need to remove the washer’s front panel or control console to access the main control board. Take pictures as you go to remember how everything is connected. Make sure to disconnect power before touching any components. This is a job that can be tricky.
Once you have access to the board, look for any obvious signs of damage, like burn marks or swollen capacitors. If you can identify the part number, you can order a replacement. Carefully swap it out, reconnecting all wires exactly as they were.
Fix the Lid Switch Assembly
The lid switch assembly is a small but vital part that ensures your washer only runs when the lid is securely closed. If this part fails, the machine will not start, even if it’s plugged in and the breaker is on. This failure of the lid switch is a very common cause for no power.
To access the lid switch, you typically need to lift the machine’s top cabinet. You’ll see a small plastic or metal mechanism near the door hinges. Examine the switch and its wiring for any visible damage, such as cracked plastic or corroded contacts.
If the switch appears damaged or if you’ve tested it and it’s not making contact, you’ll need to replace the entire assembly. Getting the correct part for your model is crucial. Installation involves disconnecting the old switch and connecting the new one, often with simple screw terminals or plugs.
- Secure the power cord connection at the back of the washer.
- Ensure the washing machine’s plug is fully inserted into the outlet.
- Perform a factory reset by unplugging the machine for five minutes.
- Clean the lid switch area and test its engagement.
- If your machine has a fuse, check if it’s blown and needs replacement.
- Consider calling a technician if these steps don’t work.
Common Causes of a Washer Not Starting
Many people search for “washing machine won’t start” and find this article. When your top load washer refuses to turn on, it’s often due to a few very specific, common issues that pop up over time. These problems usually stem from wear and tear, electrical faults, or safety mechanisms not working correctly.
Loose Door Lock
A loose door lock mechanism, or lid switch on a top loader, is a frequent culprit. This safety feature prevents the machine from operating if the door or lid isn’t securely shut and locked. You might notice the machine doesn’t even try to fill with water when you press start.
You can test the lid switch by gently pressing down on the lid while trying to start a cycle. If the machine then attempts to start, the lid switch is almost certainly the issue. You’ll want to inspect the switch for dirt buildup or physical damage to the actuator.
Cleaning the latch area or replacing a faulty lid switch assembly are usually straightforward repairs that you can do at home. Make sure you order the correct part for your specific washing machine model to ensure a proper fit and function.
Faulty Timer or Selector Switch
Some older top-load machines use a mechanical timer or a selector switch to control cycles. If this component fails, the machine won’t receive the signal to start. You might have a timer that won’t advance or a selector that feels loose and unresponsive.
You can often diagnose this by listening for clicks or whirring sounds from the timer when you try to start a cycle. If you hear nothing, or if the selector switch feels mushy, it’s a good indicator of a problem. These parts can wear out over time, like any mechanical component.
Replacing a timer or selector switch can be a bit involved, as it requires removing panels to access the component and wiring. If you’re not comfortable with electrical work, it’s best to leave this to a professional appliance repair person.
Drive Motor Failure
The drive motor is the powerhouse of your washing machine, responsible for spinning the drum and agitator. If this motor burns out or has an internal electrical fault, your washer simply won’t turn on or make any noise. You might have a whining sound followed by silence if the motor is failing.
To confirm motor failure, you’ll need to access the motor, usually by tilting the machine back or removing a panel. Inspect the motor for any signs of overheating or damage. You can also check the motor windings for continuity with a multimeter if you have one.
Replacing a drive motor is a significant repair. It involves disconnecting electrical wires and potentially belts, then physically removing and installing the new motor. If you’re not experienced with appliance repair, this is a job best left to the experts.
Main Power Relay
On some machines, a main power relay on the control board handles the flow of electricity to various components. If this relay fails, it can prevent the machine from powering on entirely. You might have no response at all from the display panel if this relay is dead.
Diagnosing a faulty relay usually requires some electrical knowledge and a multimeter. You’d typically need to test for voltage at the relay terminals to see if it’s receiving power and if it’s activating correctly. This component is part of the main electronic control board.
If the main power relay is indeed the issue, you’ll likely need to replace the entire main control board. This is often one of the more expensive repairs for a washing machine. Ensure you’ve ruled out simpler issues before considering a board replacement.
Damaged Wiring Harness
The wiring harness is a bundle of wires that connects all the components of your washer. A loose connection, a short circuit, or a damaged wire within the harness can cut off power to essential parts, including the control panel or the motor. You might notice occasional power interruptions.
Carefully inspect the entire wiring harness, looking for any signs of wear, pinching, or damage. Pay close attention to where wires connect to components like the motor, control board, and lid switch. A loose wire terminal can cause intermittent problems or complete power loss.
If you find a damaged wire or a loose connection, you can often repair it by reattaching the terminal or splicing in a new section of wire. Always disconnect power before attempting any wiring repairs. Use proper connectors to ensure a safe and durable fix.
Main Control Board Failure
As mentioned before, the main control board is the central computer for your washer. If it malfunctions, it can prevent the machine from starting, even if all other components are fine. This control board failure is often indicated by a completely unresponsive console.
You can often identify a failed control board by looking for burn marks, cracks, or bulging components on its surface. If you’ve tested all other possible causes and found them to be working correctly, the control board is the most likely culprit.
Replacing the control board involves carefully disconnecting all the wires attached to it and then installing the new board. It’s crucial to get the exact replacement part for your washer model. This repair can be costly, so it’s important to be certain of the diagnosis.
- Check for loose wires connected to the lid switch.
- Inspect the main control board for any visible damage.
- Ensure the drain pump is not preventing startup (though usually it allows power).
- Listen for any humming or clicking sounds when you try to start.
- Test the continuity of the start switch if your machine has one.
- If your machine is very old, consider the cost of repair versus replacement.
What to Check If Washer Won’t Spin
If your top load washer is getting power and filling with water, but the drum won’t spin, that’s a different problem than not turning on at all. We’re talking about a washer that fills but won’t agitate or spin. This usually points to issues with the drive system, belts, or motor itself.
Worn Drive Belt
A broken or severely worn drive belt is one of the most common reasons a washer won’t spin. This belt connects the motor to the transmission or the drum, and if it’s damaged, the motor’s power can’t reach the parts that move. You might have noticed a burning rubber smell recently.
You’ll need to get under the machine or remove a front panel to inspect the drive belt. Look for cracks, fraying, or looseness. If it feels slack or looks damaged, it needs to be replaced. Make sure you get the correct belt for your specific washer model.
Replacing the belt is usually a straightforward process. You just need to carefully slip the new belt onto the motor pulley and then stretch it onto the larger transmission or drum pulley. Ensure it’s properly seated before you run the machine.
Damaged Drive Pulley
The drive pulley is attached to the motor shaft and the belt wraps around it. If this pulley becomes damaged, cracked, or loose, it won’t effectively grip the belt, causing the motor to spin without turning the drum. You could experience slipping during the spin cycle.
Inspect the pulley for any visible damage or cracks. If it’s loose on the motor shaft, you might be able to tighten it, but if it’s damaged, it needs to be replaced. Be sure to disconnect power before working on any part of the drive system.
Replacing a pulley can sometimes be tricky, as it might be held on with a set screw or a nut. Make sure you have the right tools to remove the old one and install the new one securely. A properly functioning pulley is essential for power transfer.
Motor Coupling Failure
Some direct-drive washing machines use a motor coupling instead of a belt to connect the motor to the transmission. This coupling is designed to break if the motor or transmission experiences too much strain, preventing damage to those more expensive components. If this coupling is broken, the motor might run, but the drum won’t spin at all.
You’ll typically need to remove the washing machine cabinet to access the motor coupling, which sits between the motor and the transmission. Inspect the coupling for signs of breakage, such as missing plastic or separated pieces. This is a common wear item.
Replacing the motor coupling is generally a moderate repair. You’ll need to unbolt the motor and transmission to gain access. Ensure you align the new coupling correctly between the two components before reassembling.
Transmission Problems
The transmission is what controls the movement of the agitator and the spin basket. If the gears inside the transmission are stripped or damaged, the machine might fill and drain but won’t agitate or spin. This can sometimes be preceded by grinding noises from the gearbox.
Diagnosing transmission issues can be difficult without specialized knowledge. You might hear clunking or grinding sounds when the machine tries to spin. If you suspect a transmission problem, it’s often more cost-effective to replace the entire unit or the machine itself.
Repairing a transmission is complex and usually requires removing the entire assembly from the washer. Because of the labor and parts cost, it’s frequently not worth the investment for an older machine. Weigh your options carefully if you suspect transmission failure.
Worn Clutch Assembly
On some models, a clutch assembly helps engage the spin cycle. If this clutch wears out, it may not engage properly, leading to the drum not spinning. You might notice the washer agitates fine but won’t spin up. This is a specific part designed to wear out over time.
Accessing the clutch assembly usually involves removing the machine’s cabinet and sometimes the drive pulley or motor. You’ll need to inspect the clutch for signs of wear, such as worn friction pads or a damaged spring. The exact location and design vary by model.
Replacing the clutch assembly can be a moderately difficult repair, depending on your washer’s design. Make sure you have the correct replacement part and follow the manufacturer’s instructions or a reliable repair guide for your model.
Worn Agitator Dogs
Inside the agitator, there are plastic components called dogs that help it move back and forth. If these wear out, the agitator might not move correctly, or it might not allow the spin cycle to engage properly. This is more about the agitator not moving than the spin itself.
You can often test these by trying to turn the agitator by hand when the machine is off. If it spins freely in both directions without resistance, the agitator dogs are likely worn. This is usually part of the agitator assembly and requires replacing the whole agitator.
Replacing the agitator itself can be a simple or moderately difficult job depending on how it’s attached. Some screw on, while others have a spline that requires a special tool or technique to remove. Check your model’s specific requirements.
- Check for a broken drive belt that’s visibly snapped.
- Listen for unusual grinding or clicking sounds from the motor area.
- Ensure the transmission has the correct fluid level if applicable.
- Inspect the motor coupling for any signs of separation or damage.
- If the washer makes noise but doesn’t spin, suspect the drive system.
- Sometimes, a failed motor capacitor can prevent startup.
When the Washer Won’t Agitate
Drive System Issues
The drive system, which includes the motor, belt, and transmission, is responsible for both agitation and spin. If any part of this system is failing, you might get one function but not the other. For example, a motor might still be able to spin the drum but not have enough torque for agitation. Your drive system is worn out.
You’ll need to inspect the belts and motor as we discussed for spin issues. Check for any slippage or damage. If the motor seems weak or makes strange noises during the agitation attempt, it could be the motor itself or the components it drives.
Ensure all connections in the drive system are secure. Sometimes, a loose connection can cause intermittent issues. If you find a worn part, replace it. If everything looks good, the problem might be deeper within the transmission.
Worn Agitator Belt
Some washers use a separate belt for agitation or have a belt that drives a transmission that handles both functions. If this belt is worn, broken, or slipping, the agitator won’t receive power. You might hear the motor running, but no movement from the agitator.
Accessing this belt usually requires removing the machine’s cabinet. Inspect the belt for cracks, fraying, or looseness. If it’s stretched or damaged, it needs replacement. Make sure you order the correct belt for your model to ensure it fits and functions properly.
Replacing an agitator belt is similar to replacing a main drive belt. You’ll need to carefully position it on the pulleys, ensuring it’s seated correctly. Once replaced, test the agitation cycle to see if the problem is resolved.
Faulty Transmission
The transmission is a complex component that directs power to the agitator and the spin basket. If internal gears or components within the transmission fail, it can stop the agitator from moving while still allowing the drum to spin. This often results in grinding noises when agitation should occur.
Diagnosing a transmission problem can be tricky. You might need to remove panels to examine its external condition and listen for unusual sounds. Internal transmission failures are difficult to repair and often mean replacing the entire transmission assembly.
Transmission replacement is a major repair. It involves disconnecting the motor, drive belts, and the transmission itself from the machine’s frame. Given the cost and complexity, many people opt for a new washer if the transmission fails.
Agitator Mechanism Wear
Inside the agitator assembly, there are plastic components or gears that enable the up-and-down or back-and-forth motion. If these wear out, the agitator might not move correctly, or it might not move at all. This internal wear in the agitator is a common cause.
You can sometimes test this by trying to manually move the agitator while the machine is off. If it feels loose, spins freely, or doesn’t engage properly, the internal mechanism might be worn. Repairing this often means replacing the entire agitator assembly.
Replacing the agitator typically involves removing a cap or bolt at the top of the agitator and then lifting it off. Ensure you get the correct replacement agitator for your washing machine model before you start the job.
Motor Control Board or Timer
The control board or timer dictates when the motor should engage for agitation. If there’s a fault in the electronics that control this function, the agitator might not move, even if the motor is otherwise working. You might find the control board has no response for the agitation cycle.
If you suspect an electronic control issue, try performing a reset. If that doesn’t work, you may need to test the output signals from the control board to the motor using a multimeter. This requires some electrical diagnostic skills.
Replacing a control board can be expensive, so it’s important to be sure this is the issue. If your washer is older, the cost of a new control board might approach the price of a new machine.
Loose Drive Connection
The connection between the motor and the transmission can sometimes loosen. This can happen if bolts or mounting hardware come undone, preventing the motor’s power from being fully transferred for agitation. You might notice a rattling sound during the cycle.
Check all mounting bolts and connections related to the motor and transmission. Ensure everything is tight and secure. Vibrations over time can cause these to loosen, leading to performance issues. This is a relatively simple fix if you find loose hardware.
Tightening loose connections is a straightforward repair. Just make sure you use the correct size wrench or socket and tighten them firmly. A secure drive connection is essential for proper operation.
- Check the clutch assembly for wear and tear.
- Inspect the transmission output shaft for damage.
- Ensure the drain pump is not hindering the agitation process.
- Test the continuity of the motor windings.
- Consider the age of your washer if repairs are extensive.
- If you hear clunking sounds, suspect the transmission.
How to Test Your Washer’s Motor
Before you go buying a new motor, you need to be sure the old one is actually bad. Testing your washing machine’s motor involves checking for power and continuity. This step is crucial to avoid unnecessary expenses and effort. Your motor is not receiving power can be confirmed with testing.
Check Power Supply to Motor
First, you need to ensure power is actually reaching the motor. Unplug the washer, then access the motor. You’ll need to locate the wires that supply electricity to it. Use a multimeter set to AC voltage to test the voltage at the motor terminals.
Reconnect the power to the washer (carefully!) and run a test cycle. Measure the voltage. If you don’t get the correct voltage reading, the problem is upstream from the motor—likely the control board or wiring. If you do get power, then the motor itself might be faulty.
Always ensure power is disconnected before making any physical contact with the motor or its wiring. Your safety is paramount when working with appliances, especially their electrical components. Confirming power is a vital step.
Test Motor Windings
If power is reaching the motor, the next step is to test the motor windings for continuity. Unplug the washer again. Set your multimeter to the resistance (ohms) setting. Touch the probes to the terminals where the power wires connect to the motor.
You should get a resistance reading between the terminals. If you get an “open loop” reading (often displayed as “OL” or infinity), it means the windings are broken, and the motor is bad. If you get zero resistance, that indicates a short circuit, and the motor is also bad.
You should also test for continuity between each terminal and the motor casing. If you get any reading other than OL, it means the motor is shorted to ground and needs to be replaced. This motor winding continuity test tells you if the motor’s internal electrics are sound.
Test Motor Capacitor
Some washing machine motors use a capacitor to help them start. If the capacitor is faulty, the motor might not start or might run weakly. You’ll need to disconnect the capacitor wires (unplug the machine first!). Test the capacitor using a multimeter set to capacitance (farads).
If the capacitor doesn’t read within its rated range (or reads zero), it needs to be replaced. Capacitors can hold a charge, so discharge it safely by shorting the terminals with an insulated screwdriver before handling. This faulty start capacitor is a common issue.
Replacing a capacitor is usually simple; just ensure you get one with the correct microfarad (MFD) rating and voltage. Connect the wires exactly as they were on the old one. Test the motor again after replacing the capacitor.
Check Motor Mounts
While not directly testing the motor’s electrical function, checking the motor mounts is important. If the motor is loose or the mounts are broken, excessive vibration can occur, leading to wiring damage or stress on motor components.
Ensure the motor is securely fastened to its mounting bracket. Worn rubber mounts can also cause excessive vibration. If the mounts are cracked or compressed, they should be replaced to keep the motor stable.
Properly mounted motors run more efficiently and last longer. They also reduce stress on other connected parts, like belts and transmissions. A stable motor is key to a healthy appliance.
Inspect Drive Coupling
If you have a direct-drive washer, the motor connects directly to the transmission via a coupling. A worn or broken coupling will prevent the motor’s power from reaching the transmission, meaning no agitation or spin. You might see the motor spins, but the drum does not.
Access the coupling, usually by removing the washer cabinet and possibly unbolting the motor or transmission. Inspect the coupling for cracks, breaks, or worn-out plastic sections. This component is designed to fail under stress to protect more expensive parts.
Replacing the coupling is a common repair. You’ll need to align the motor and transmission properly when installing the new one. Ensure all bolts are tightened securely.
Look for Burn Marks
A quick visual inspection of the motor can sometimes reveal problems. Look for any signs of scorching, burn marks, or melted plastic on the motor housing or wiring connections. Obvious burn marks on the motor indicate internal damage from overheating.
If you see any such signs, the motor has likely suffered internal damage and will need to be replaced. These marks are evidence of a serious electrical fault within the motor windings. Don’t try to repair a motor that shows signs of burning.
Take clear photos of the motor and any damaged wiring before you start removing it. This will help you remember how everything is connected and how to reassemble it correctly.