As an Amazon Associate, I earn from qualifying purchases at no extra cost to you.
How to Fix Coffee Maker Leaks: Easy Solutions
 ByZayyan
You know how annoying it can be when your coffee maker starts leaking. It’s a common problem that can mess up your mornings. If you’re dealing with this issue, you’re not alone.
Leaks can happen for various reasons, like a worn-out seal or a cracked reservoir. But don’t worry! This guide will help you find out why your coffee maker is leaking and what you can do to fix it.
By following these simple steps, you can get your coffee maker working perfectly again and enjoy your coffee without any spills or mess. Let’s get started!
Troubleshooting Coffee Maker Leaks: Quick Fixes to Stop Water Spills
You’re enjoying your morning coffee when suddenly, you notice water leaking from your coffee maker. This can be frustrating, but don’t worry! Here’s a simple guide to help you fix the problem.

1. Check the Water Reservoir
The water reservoir is a key component of your coffee maker, and it’s crucial to ensure it is functioning correctly to prevent leaks. Start by removing the reservoir from the coffee maker and examining it closely.
Make sure it is properly seated in the coffee maker. If it is not aligned correctly, it can cause leaks as the water will not flow properly into the brewing chamber.
Look for any visible cracks or damage in the reservoir. Even small cracks can lead to leaks, so it’s important to inspect it thoroughly. If you find any damage, you will need to replace the reservoir.
Also, make sure that the reservoir is clean and free from any coffee grounds or residue. Sometimes, debris can prevent the reservoir from sealing properly, causing leaks.
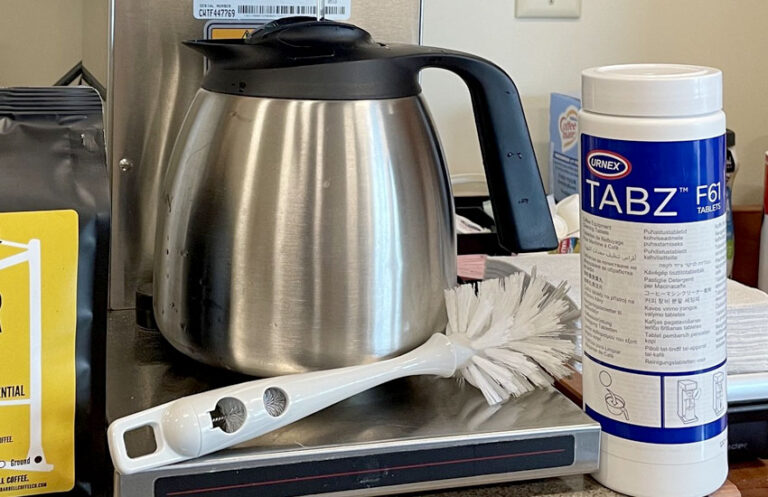
To clean it, rinse it under warm water and use a soft brush if needed to remove any stubborn residue. After cleaning, ensure the reservoir is completely dry before placing it back into the coffee maker.
If you continue to experience leaks even after checking the reservoir, the issue might be related to other components of the coffee maker, such as the brew basket or the carafe.
2. Inspect the Brew Basket
The brew basket is where you place the coffee grounds and is essential for the brewing process. If the brew basket is not correctly positioned or if the seal is damaged, it can lead to leaks.
Begin by removing the brew basket from the coffee maker and inspecting it carefully. Ensure that it is properly seated and that it fits snugly into place. Sometimes, if the basket is not aligned correctly, water can escape during the brewing process.
Check the seal around the brew basket for any signs of wear or damage. The seal is crucial for preventing water from leaking out. If the seal is cracked or worn out, you might need to replace it.
Additionally, clean the brew basket thoroughly to remove any coffee grounds or residue that could be affecting the seal. Use warm water and a mild detergent, and avoid using abrasive cleaning tools that could damage the basket. After cleaning, dry the basket completely before reinserting it into the coffee maker.
If the brew basket seems to be in good condition but you are still experiencing leaks, you might want to check other parts of the coffee maker for potential issues, such as the carafe or the water lines.
3. Examine the Carafe
The carafe is another critical component that can contribute to leaks if it is not properly maintained. Start by inspecting the carafe for any visible cracks or damage.
Even small cracks can lead to leaks, so it’s important to check it carefully. If you find any damage, consider replacing the carafe to prevent further issues.
Next, ensure that the carafe is correctly seated on the warming plate. If the carafe is not aligned properly, it can cause spills and leaks. Make sure the carafe fits securely on the warming plate and is free from any obstructions.
Clean the carafe thoroughly to remove any coffee stains or residue that could affect its performance. Use warm, soapy water and a sponge or cloth to clean it, and avoid using abrasive materials that could scratch the surface.
If you are using a carafe with a lid, check that the lid is properly sealed and free from any cracks. A damaged lid can also cause leaks. If you continue to experience leaks even after checking the carafe, you might need to look at other components of the coffee maker, such as the water reservoir or the brew basket, to identify and fix the problem.
4. Look for Clogged Water Lines
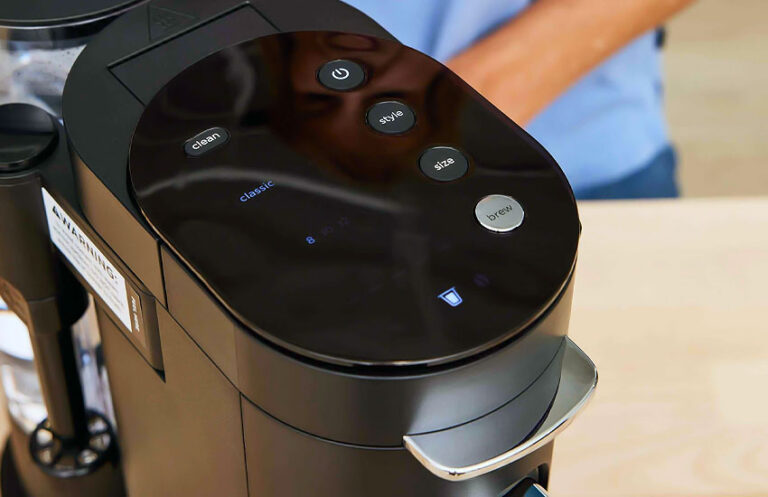
Clogged water lines can cause significant issues with your coffee maker, including leaks. Over time, coffee makers can develop blockages in the water lines due to mineral deposits or coffee residue. To address this, you should perform a cleaning cycle using a suitable cleaning solution.
Most coffee makers have a cleaning mode or you can run a solution of equal parts water and white vinegar through the machine. This helps to dissolve and remove any blockages or mineral deposits in the water lines.
Follow the manufacturer’s instructions for the cleaning process, as different coffee makers might have specific requirements. After running the cleaning solution through the machine, rinse it thoroughly by running several cycles of clean water through it to remove any residual cleaning solution. This step is crucial to ensure that no cleaning agents are left in the machine that could affect the taste of your coffee.
If you continue to experience leaks after cleaning the water lines, it might indicate a more serious issue with the coffee maker’s internal components. In such cases, you might need to consult the manufacturer’s support or consider professional repair services to address the problem.
5. Check the Heating Element
The heating element in your coffee maker plays a critical role in heating the water for brewing. If it’s not working correctly, it can cause various issues, including leaks.
Start by inspecting the heating element for any visible signs of damage or malfunction. Ensure that it is clean and free from any coffee residue or mineral deposits that could affect its performance.
To check the heating element, refer to your coffee maker’s manual for specific instructions. Some coffee makers allow you to access the heating element for inspection, while others might require you to disassemble the machine. If you’re unsure how to proceed, consult the manufacturer’s support for guidance.
If you find that the heating element is damaged or not functioning properly, you may need to replace it. Many coffee makers have replaceable heating elements that can be purchased from the manufacturer or a third-party supplier. Follow the manufacturer’s instructions for replacing the heating element to ensure proper installation.
If you continue to experience leaks or other issues with your coffee maker after checking the heating element, there might be other underlying problems with the machine. In such cases, it’s best to seek professional repair services to address the issue effectively.
I hope these tips help you fix the leaks in your coffee maker and enjoy your coffee without any spills!
Frequently Asked Questions
What should I do if my coffee maker leaks from the bottom?
If your coffee maker leaks from the bottom, it could be due to a faulty seal or a damaged water reservoir. Check if the reservoir is properly seated and inspect for any cracks or damage.
Ensure the carafe is positioned correctly on the warming plate. If the issue persists, inspect the internal components for any leaks or blockages and consider contacting the manufacturer for further assistance.
How can I prevent my coffee maker from leaking in the future?
To prevent future leaks, regularly clean your coffee maker and check for any signs of wear or damage. Make sure the water reservoir and brew basket are properly aligned and seated.
Use filtered water to reduce mineral deposits and perform regular descaling to keep the water lines clear. Always follow the manufacturer’s cleaning and maintenance instructions to keep your coffee maker in good working condition.
Why does my coffee maker leak when brewing?
If your coffee maker leaks during brewing, it may be due to a misaligned or damaged brew basket. Ensure the brew basket is seated properly and the seal is intact.
Check for clogs in the water lines or the drip area. If the leak persists, inspect the water reservoir and heating element for any issues. Regular cleaning and maintenance can help prevent such leaks from occurring.
What can I do if my coffee maker is leaking coffee grounds?
Leaking coffee grounds might indicate that the brew basket is not correctly seated or the filter is damaged. Ensure the brew basket fits securely and that you are using the correct size and type of filter.
Clean the brew basket and the area where it sits to remove any coffee residue. If the issue continues, check for any cracks or damage in the basket that might require replacement.
How often should I clean my coffee maker to prevent leaks?
You should clean your coffee maker at least once a month to prevent leaks and maintain optimal performance. Regular cleaning helps remove coffee oils and mineral deposits that can cause blockages and leaks.
Follow the manufacturer’s instructions for cleaning and descaling, and use a solution of water and vinegar or a specialized coffee maker cleaner to ensure thorough cleaning of all components.
What should I do if my coffee maker leaks during the warming cycle?
Leaks during the warming cycle might be due to a malfunctioning heating element or a misaligned carafe. Check that the carafe is properly seated on the warming plate and inspect for any cracks or damage.
Ensure the heating element is clean and functioning correctly. If the leak persists, consult the manufacturer’s instructions or consider seeking professional repair to address potential issues with internal components.
Can a clogged water line cause my coffee maker to leak?
Yes, a clogged water line can cause your coffee maker to leak. Blockages in the water line can prevent proper water flow and cause backups, leading to leaks. To resolve this issue, run a cleaning solution through the coffee maker to remove any clogs or mineral deposits. Regularly descale your coffee maker to keep the water lines clear and prevent future leaks.
How can I fix a coffee maker that leaks when not in use?
If your coffee maker leaks when not in use, check the water reservoir and ensure it is properly seated and free from cracks. Inspect the brew basket and carafe for any signs of damage.
Look for leaks in the internal components and water lines. If necessary, clean the coffee maker thoroughly and consult the manufacturer’s instructions or customer support for further troubleshooting.
Is it safe to use a coffee maker that is leaking?
Using a leaking coffee maker is not recommended, as it can lead to potential safety hazards such as electrical issues or damage to countertops.
Leaks can also affect the coffee maker’s performance and lead to further damage. It’s best to address the cause of the leak promptly by inspecting and cleaning the coffee maker or seeking professional repair if needed.
How do I know if the leak in my coffee maker is due to a defect?
If you’ve tried troubleshooting common issues like checking seals, cleaning, and inspecting components, but the leak persists, it might be due to a defect. Look for visible damage or malfunctions that cannot be resolved through regular maintenance.
If the coffee maker is still under warranty, contact the manufacturer for a replacement or repair. If not, consider consulting a professional for a detailed inspection.