As an Amazon Associate, I earn from qualifying purchases at no extra cost to you.
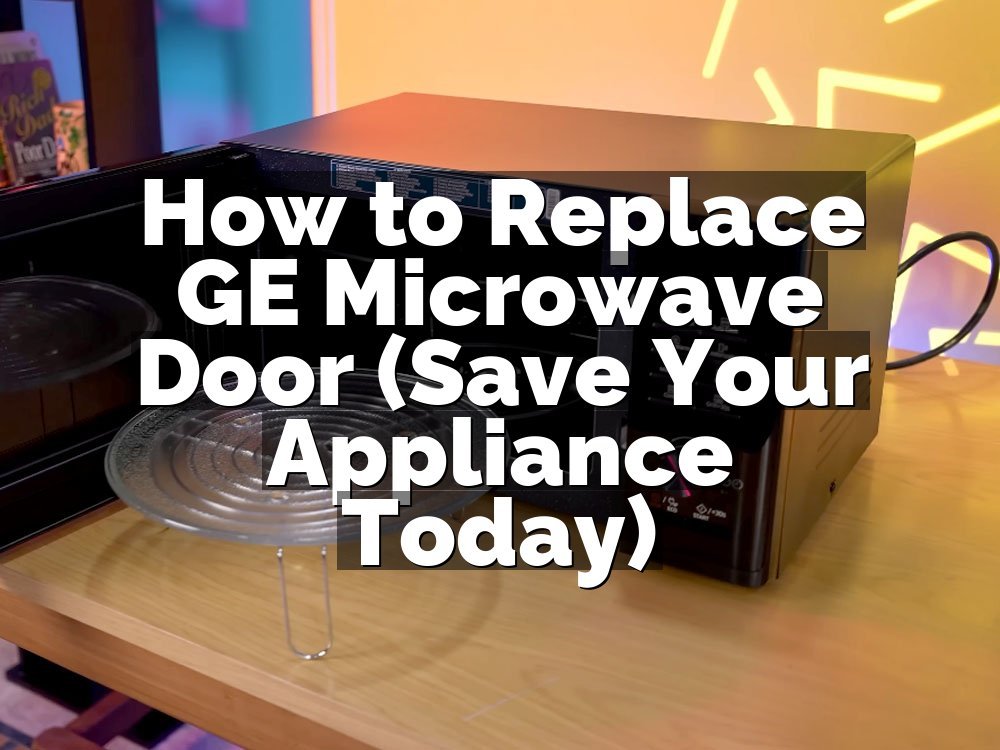
How to Replace GE Microwave Door Handle (Save Your Kitchen Budget)
 ByZayyan

I walked into my kitchen last Tuesday, grabbed the microwave handle, and it just came off in my hand. It was not even a dramatic pull. The plastic clips inside had simply given up after years of daily use. I stood there for a minute, staring at the detached piece, wondering if I had to buy a whole new appliance.
After checking the parts list, I realized I could fix this myself for about thirty dollars. I want to show you how to do this in under twenty minutes so you can stop dealing with a loose, dangling handle that ruins the look of your kitchen.
You need a Phillips head screwdriver, a plastic putty knife, and a new replacement handle. First, unplug the microwave to stay safe. Open the door, remove the screws on the inner door frame, and pull the old handle away from the glass. Snap the new handle into the existing holes, replace the screws, and test the latch. You are done.
Why GE Microwave Handles Fail So Often
Most people think they did something wrong when a handle snaps off, but it usually just comes down to the materials used in the factory during the assembly process.
Plastic Structural Integrity
The internal clips are almost always made of thin plastic. They hold the weight of the heavy door every time you pull it open. Over time, heat from the stove below makes the plastic brittle. It reaches a point where it can no longer flex. Once that happens, the snap is inevitable. It is a common GE microwave door handle issue that leaves many cooks frustrated and searching for answers.
Constant Daily Pressure
Think about how many times a day you open that door. It adds up to thousands of cycles over a few years. That repetitive stress causes microscopic cracks to form in the mounting points. You might not see them at first, but the structure is slowly failing. One day, you give it a normal pull, and the structural integrity finally gives out completely.
Poor Thermal Management
Microwaves often sit directly above the range. This means the handle is exposed to steam and grease from your cooking. The grease gets into the tiny gaps around the handle mount. It breaks down the plastic over time. This makes the material weak and prone to snapping. I always try to wipe the handle area clean to stop this grease buildup.
Incorrect Installation Methods
Sometimes the factory does not seat the handle perfectly. If it sits at a slight angle, the tension is uneven. One side takes more stress than the other. That side will crack first. I have seen this on brand new models. If you notice your handle wobbles even a tiny bit, it is already under too much pressure.
Metal Fatigue Factors
Even when the handle is metal, the mounting screws often screw into plastic inserts. Metal is strong, but the plastic holding the screw is not. The metal handle stays intact while the plastic support crumbles. This makes it look like a sturdy part failed. In reality, the foundation of the connection simply could not hold the metal in place anymore.
Lack of Regular Maintenance
We forget to tighten the screws inside the door frame. If the handle feels loose, it vibrates every time the microwave runs. That vibration accelerates the wear on the plastic clips. I suggest checking the screws every six months. Just open the door and look for the screws on the inner panel. A quick tighten can prevent a total handle break.
Actually, let me back up a second. Before you order a part, check the model number inside the door. If you order the wrong handle, you will be stuck with a part that does not fit.
- Check the serial plate inside the door frame.
- Search for your specific model number online.
- Ensure the color matches your current finish.
- Check if the handle needs extra mounting screws.
- Read the reviews for the specific replacement part.
- Measure the distance between the two mounting holes.
Replacing the GE Microwave Door Handle Step by Step
Fixing a broken microwave handle is easier than most people think, but you must be careful with the glass panel. Take your time, stay patient, and follow these specific steps.
Preparation for the Repair
Unplug your microwave from the wall outlet. This is a safety rule you should never ignore. Open the door wide so you have enough room to work comfortably. Place a soft towel on your counter. This protects the microwave door if you accidentally drop a screw or the handle assembly during the process.
Clear your workspace so you have plenty of light. You want to see the small screws on the inner panel clearly. If your microwave is mounted above the range, make sure the stove is cool. You do not want to burn your arms while you are working. Having a clear view makes the whole job much simpler.
Gather your tools on the towel. I always use a magnetic screwdriver if I have one. It stops the small screws from falling into the dark crevices of the door frame. If you do not have a magnetic one, just be extra careful. A small piece of tape can help hold a screw to the tip.
Removing the Old Handle
Look at the inner side of the microwave door. You will see several screws holding the inner plastic panel to the door frame. Use your Phillips head screwdriver to take those screws out. Keep them in a small bowl. You will need them later. Do not lose these, as they are specific to the door frame.
Once the screws are out, use your plastic putty knife to gently pry the inner panel away from the door. Start at the corner and work your way around. The panel is held by clips that snap into the metal door. You will hear a few popping sounds as the clips release. Just work slowly and carefully.
If you feel too much resistance, stop and check for hidden screws. Some models have a screw hidden behind a plastic cap. Once the panel is loose, pull it gently toward you. Be careful not to strain the wires that lead to the door latch assembly. You do not need to disconnect any wires to change the handle.
Detaching the Broken Part
Now that the inner panel is pulled away, you can see the back of the handle. You will find two or three screws holding the handle onto the outer door skin. Unscrew these completely. The handle will now be free from the door. Hold the handle firmly so it does not fall and scratch your stove.
Take a look at the area where the handle was attached. You might see some old grease or dust buildup. Take a damp cloth and wipe the area clean. This is a great time to clean the inside of the door frame as well. A clean surface helps the new handle sit flat against the metal.
Check the mounting holes for any debris. If the plastic clips from the old handle broke off, make sure you clear those pieces out. You do not want any plastic chunks stuck in the holes. A clean mounting spot is the key to a tight fit. It prevents the new handle from feeling loose later.
Installing the New Handle
Align the new handle with the holes on the outside of the door. Make sure the handle is oriented the right way. Hold it in place with one hand. Reach inside the door with your other hand to line up the screws. It might take a moment to get the threads started. Do not force them.
Tighten the screws until they are firm. Do not overtighten them, or you might crack the plastic mounting points on your new handle. You just want them snug. If the handle has a bit of wiggle, give the screws another quarter turn. Test the grip with a gentle pull to verify it is secure.
Check that the handle is flush against the door. If there is a gap, it means the handle is not seated correctly. Loosen the screws and try to wiggle the handle until it sits flat. Once you are happy with the alignment, you are ready to put the door panel back together.
Closing the Door Panel
Line up the inner panel with the door frame. Push the panel gently into place. You should hear the plastic clips snap back into the metal frame. Start from the top and work your way down. Ensure the alignment is straight before you apply pressure. Take your time to get it right.
Once the panel is in place, put the screws back into the inner frame. Tighten them by hand. Again, do not use a power drill. Power tools have too much torque and can easily crack the plastic panel. A manual screwdriver is the best tool for this job. It keeps the pressure under your control.
Check the door latch to make sure it still works. Open and close the door a few times. If the microwave does not start, the door might not be closing tight enough. Check the alignment of the door panel one more time. Everything should be smooth and firm. You have finished the repair successfully.
Testing the Final Result
Plug your microwave back into the power source. Put a cup of water inside. Run the microwave for thirty seconds. Check that the door stays shut and that the handle feels sturdy. If you hear any weird rattling, double check the screws. The handle should feel solid, like it came from the factory this way.
Listen for the sound of the door latch. It should click firmly when you close it. If it feels soft or mushy, the door panel might not be snapped all the way in. Press around the edges of the panel until you hear it snap. That should fix the issue. Now you are back in business.
Wipe down the door one last time. You have saved yourself a lot of money by doing this yourself. You now know exactly how to handle this if it happens again. The next time you grab that handle, you will know that it is held by your own hard work. That is a great feeling.
- Gather all necessary tools before you start.
- Use a plastic tool to avoid scratching the door.
- Keep your screws in a small bowl or container.
- Clean the mounting surface before installing the new part.
- Tighten screws manually instead of using a drill.
- Test the door latch operation after finishing the assembly.
Taking on this repair is a solid way to extend the life of your kitchen gear. It is not complex, but it does require a bit of patience. Do not rush the process, and you will have a perfectly working microwave handle in no time.
Is It Necessary to Remove the Door Completely?
You do not need to remove the whole door to swap the handle. Most people worry they will have to take the hinges off, but that is rarely true. You only need to open the door and work from the inside of the frame.
Taking the door off is a massive headache. You have to worry about the hinges and the internal wiring. If you pull the wires too hard, you might break the interlock switches. Then you have a much bigger problem than just a broken handle. Keep the door on the hinges.
I find that working while the door is attached is much more stable. The door stays in one place while you push against it. If the door is loose on a table, it moves around while you try to align the screws. Just keep it on the hinges. It saves you at least thirty minutes of extra work.
If you really feel like the door is in the way, you can prop it up with a stack of books. That gives you a steady surface without needing to disconnect any cables. Just make sure the microwave is unplugged. You do not want it to start running if your elbow hits the keypad.
- Keep the door attached to the hinges.
- Use a book stack to steady the door.
- Always unplug the microwave before starting.
- Avoid pulling on the internal wire harnesses.
- Work with the door wide open.
- Check the manual if you are still unsure.
Does the Color of the Handle Matter for Compatibility?
The color is purely for looks, but the part number is what matters for the fit. GE makes many different handles that look similar. You might find a black handle that looks like it fits your stainless steel model. Do not assume they are interchangeable. Always use your specific model number to order.
If you buy the wrong size, you will have to deal with the return process. That wastes days or weeks. I once tried to guess the part based on a photo, and the screw holes were off by half an inch. It was a waste of time. Trust the model number list provided by the manufacturer.
Sometimes the finish is the only difference. If you can only find a white handle for a black microwave, it will look a bit strange. But it will function perfectly. If you are desperate to get the kitchen running again, the color might be a secondary concern. Just make sure the mounting holes line up.
Check the part description carefully before you click buy. Some sellers list “compatible with” models. Verify your model is on that list. If it is not, look for another listing. It is better to wait two extra days for the correct part than to try and force the wrong one.
- Confirm the part number against your model.
- Do not rely on pictures alone.
- Match the finish to your current appliance.
- Check the description for model compatibility.
- Use official parts stores when possible.
- Double check the hole measurements if unsure.
Can I Use Super Glue to Fix the Broken Clips?
I get this question all the time. Please do not try to glue the handle back together. Super glue, epoxy, or hot glue will not hold under the stress of opening a microwave door. The moment you pull on it, the glue will snap again. It is a temporary fix that is bound to fail.
The plastic inside the handle is designed to flex. Glue is rigid. It does not handle that flexing motion well. Even if it stays for a day, the weight of the door will eventually pull it apart. You are just wasting your time and creating a bigger mess for when you finally buy a replacement.
I have seen people try to use metal brackets and screws. That looks terrible and can actually damage the glass door. Just buy the replacement part. It is cheap enough that it is not worth the stress of a failed DIY repair. You want a fix that lasts for years, not a fix that lasts for hours.
If you really want to try something, use a strong automotive adhesive. But even then, I would not trust it. The handle is a high-stress part. It is not like a decorative trim piece. It needs to be structural. Replace it properly the first time so you can stop worrying about it.
- Avoid glue as a permanent solution.
- Recognize that handles are under high stress.
- Glue often leaves a messy residue.
- DIY metal fixes can break the glass.
- Replacement parts are inexpensive and reliable.
- Focus on a structural repair, not a cosmetic one.
Will a Generic Handle Work on My Microwave?
Most generic handles are not worth the risk. Microwave design is very specific. Even if the handle looks the same, the mounting depth or the screw thread type might be different. I have tried generic parts in the past, and they usually end up wobbling or stripping the screw holes.
You want a part that was made for your specific machine. It will fit perfectly, and the screws will line up without a fight. Generic parts often require you to drill new holes or modify the door. I do not recommend doing that. You do not want to compromise the integrity of your microwave door.
The shielding inside the door is crucial for safety. When you start drilling or changing the way the door is built, you risk damaging that shield. Stick to the parts that were designed for your unit. It is the safest way to ensure your microwave keeps working like it should.
Some generic handles claim to be universal. These are usually designed for very basic models. If you have a high-end microwave with a complex latch, a universal handle will likely not work. Save your money and buy the part that matches your model number. It is the smartest way to go.
- Avoid universal handles for complex models.
- Verify the part is made for your brand.
- Check for OEM part numbers.
- Avoid drilling into the door frame.
- Ensure the mounting hardware is included.
- Prioritize safety over a few saved dollars.
Final Thoughts
I hope this helps you get your kitchen back to normal. It is frustrating when a handle breaks, but it is a very manageable project. Take your time, keep your screws organized, and enjoy the satisfaction of fixing it yourself. You have got this. It feels good to solve these little problems without calling a pro. Good luck with the repair.
| Part Name | Function | Replacement Difficulty |
|---|---|---|
| Door Handle | Provides Grip | Easy |
| Inner Panel | Holds Latches | Moderate |
| Mounting Screws | Secures Handle | Very Easy |
| Plastic Clips | Maintains Tension | Easy |
| Door Latch | Safety Lock | Moderate |
| Glass Window | Heat Shield | Difficult |
| Door Frame | Structural Support | Moderate |
| Hinge Pin | Allows Movement | Moderate |
| Safety Switch | Power Control | Difficult |
| Tension Spring | Door Return | Easy |
Frequently Asked Questions
Is It Safe to Use the Microwave Without a Handle?
You can still open the door by pulling on the edge of the frame, but it is not recommended. You might scratch the finish or damage the door seal, which can affect the microwave’s ability to keep radiation inside.
Can I Replace Only the Broken Part of the Handle?
Usually, no. GE handles are sold as single units. Even if only one clip is broken, you have to replace the entire handle assembly. The clips are molded into the structure and cannot be swapped out individually.
Are GE Microwave Handles Universal Across All Models?
No, they are not universal. Each model has a unique door shape and mounting pattern. You must use your specific model number to find the right part, or it will not fit your door frame correctly.
Do I Need Special Tools to Change the Handle?
You only need a standard Phillips head screwdriver and a small plastic putty knife. That is it. You do not need any fancy tools, and you certainly do not need a power drill for this simple repair.
Does the Door Seal Get Damaged During This Repair?
The door seal should stay intact as long as you are careful. Just avoid pulling on the rubber seal itself. If you notice the seal looks loose after the repair, press it back into the channel firmly.
Should I Clean the Door While the Handle is Off?
Yes, absolutely. This is the perfect time to clean the grime that gathers around the handle area. Once the handle is off, you can reach all those tight spots that you usually cannot get to with a cloth.
Will Replacing the Handle Fix a Loose Door?
If the door is loose because of a broken handle mount, then yes, it will fix it. If the door is loose because of the hinges, you might need to adjust or replace the hinges instead.
How Long Does the Average Handle Last?
With normal use, a handle should last for many years. However, if your microwave is right above a hot stove, the heat and grease can wear out the plastic clips much faster than in a cooler area.