As an Amazon Associate, I earn from qualifying purchases at no extra cost to you.
Easy Steps to Sharpen Your Knife with Another Knife
 ByZayyan
Imagine you’re in the middle of preparing a meal, chopping vegetables or slicing through meat, and suddenly, your knife is dull. Instead of running out to buy a sharpening stone or a fancy electric sharpener, what if I told you that you could sharpen a knife using another knife? While this method might seem unconventional, it’s not only possible, but can also be quite effective in a pinch.
Sharpening a knife with another knife is an art, and it requires some practice to master. It’s all about utilizing the right technique, understanding the angle, and being patient. So, if you’ve ever found yourself stuck without your usual sharpening tools, here’s a guide to help you sharpen your knife using another one.
In this article, we’ll walk you through the entire process step-by-step. We’ll also dive into the science of knife sharpening, why this method works, and when you might want to use it. Let’s get started!
Why Sharpening a Knife with Another Knife Works
Before we jump into the “how” of sharpening knives with other knives, it’s important to understand the science behind why this technique works. Knives are designed with a sharp edge, which is usually at an angle (typically between 15 and 20 degrees) depending on the type of knife. Over time, the edge becomes dull due to friction and use. When sharpening a knife, you essentially restore that sharp edge by removing small amounts of metal to create a new, finer edge.
Sharpening with another knife works because you are effectively using the second knife as a honing tool. Instead of using a sharpening stone or a steel rod, the edge of the second knife will help grind down and refine the edge of the first knife, smoothing it out and restoring its sharpness. This method is particularly useful if you don’t have access to traditional sharpening tools or when you’re in a survival situation, for instance.
When you use one knife to sharpen another, you are typically rubbing the blades against each other at a specific angle. This angle is critical to avoid damaging the edge. Over time, the repetitive motion will help realign the microscopic teeth on the knife’s edge, making it feel sharper.
So, while this isn’t a method for turning a completely dull knife into a brand new one, it can definitely help restore some sharpness and make your knife more functional for everyday tasks.
Steps to Sharpen a Knife with Another Knife
1. Choose the Right Knife for Sharpening
Not all knives are made equal, and you want to make sure you’re using the right one for sharpening purposes. For this technique, it’s best to use a knife that has a hard, durable edge. Ideally, the second knife should have a harder steel than the one you’re sharpening. If you’re using a kitchen knife to sharpen another, make sure that both knives are of similar size and weight.
A well-made stainless steel knife or carbon steel knife works best. Avoid using knives with soft or cheap materials, as these can get damaged in the process.
Additionally, you should ensure the knife you are using for sharpening is not overly damaged or dull. If it’s too dull, it won’t work effectively. You want the second knife to have a reasonably sharp edge so that it can effectively remove small amounts of metal from the blade you’re sharpening.
2. Find a Stable Surface
When you’re sharpening a knife with another knife, you need to work on a stable, non-slippery surface. Ideally, this should be a flat surface like a countertop or cutting board. Using a surface with good traction will allow you to apply the right amount of pressure without the risk of slipping or injuring yourself.
Make sure the knives are clean and dry before you begin. Any moisture or food residue can interfere with the sharpening process, and the knives may slip, increasing the chances of accidents. Safety is always a top priority, so take a moment to make sure your setup is secure before you start.
3. Hold the Knives at the Correct Angle
One of the key aspects of sharpening a knife properly is maintaining the correct angle between the two blades. The ideal angle is typically between 15 and 20 degrees. This angle allows you to effectively hone the edge without causing unnecessary damage to the knife. If the angle is too steep, you could damage the blade. If it’s too shallow, the edge won’t sharpen properly.
To determine this angle, imagine the two knives forming a V shape. The angle at which they meet is where the magic happens. If you’re unsure about the angle, you can start with a wider angle (20 degrees) and gradually adjust it as you gain more confidence in the process.
When you’re holding both knives, make sure your grip is firm but not too tight. You should be able to move the knives smoothly, without excessive pressure. If you press too hard, you risk damaging the edge of both knives.
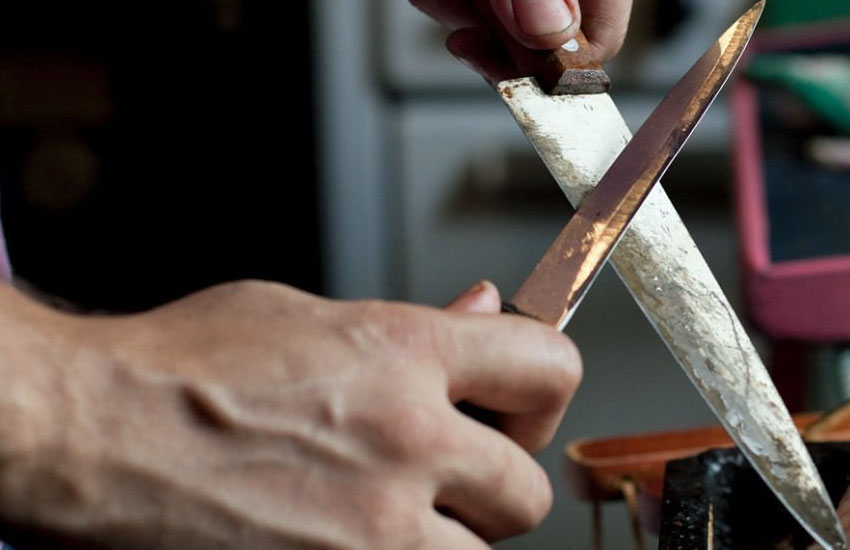
4. Start the Sharpening Motion
Now that you have your knives set up at the right angle, it’s time to start the sharpening process. Hold the knife you’re sharpening at the 15–20-degree angle against the edge of the second knife. Begin gently pulling the knife along the edge of the second knife, moving from the heel of the blade toward the tip. Be sure to maintain the angle throughout the entire process.
This motion should be smooth and consistent. You’re not trying to saw through the metal, but rather applying gentle pressure to grind away small amounts of material. Repeat this motion several times on one side of the knife before switching to the other side. The goal is to ensure both sides of the blade are sharpened evenly.
5. Alternate Sides for Even Sharpening
To ensure the blade remains sharp and balanced, it’s important to alternate between sides of the blade. Start by sharpening one side, then switch to the other side. Make sure you do the same number of strokes on each side to maintain an even edge.
Be patient during this process. The goal is to gradually refine the edge, not rush through it. After a few strokes on each side, you should begin to notice a slight improvement in the sharpness of the knife. However, it may take some time to achieve a noticeable difference, so don’t expect instant results.
6. Test the Sharpness of the Knife
Once you’ve done a few rounds of sharpening on both sides, it’s time to test the sharpness of the knife. You can perform a simple paper test. Hold a sheet of paper and try to slice through it. If the knife glides through the paper without any resistance or tearing, it’s sharp enough for use.
If you’re still not satisfied with the sharpness, repeat the sharpening process a few more times. Remember to keep the angle consistent and the motion smooth.
7. Finish and Clean the Knife
After you’ve achieved the desired sharpness, you’ll want to finish by cleaning both knives. Use warm water and mild soap to remove any metal shavings or residue left from the sharpening process. Dry the knives thoroughly before storing them. It’s also a good idea to oil the blades with a light coating of mineral oil to prevent rust, especially if you’re using carbon steel knives.
When Should You Use This Method?
While sharpening a knife with another knife can be quite effective in certain situations, there are times when you might want to use a more traditional method. This technique is best for situations when you don’t have access to a sharpening stone or honing steel, such as during camping trips, in survival situations, or when you’re caught without your usual tools.
This method is also useful for minor touch-ups to restore the edge on a knife that’s become slightly dull. However, if your knife is severely dull or damaged, you’ll need to use a sharpening stone, honing rod, or a professional service to get it back into shape.
Sharpening a knife with another knife is a simple yet effective way to maintain the sharpness of your tools. With the right technique, patience, and a steady hand, you can restore your knife’s edge and keep it functioning well. While this method is not a replacement for more traditional sharpening tools, it’s a great backup to have in your arsenal.
If you follow the steps outlined above, you should be able to keep your knives sharp and ready for use in no time. Happy sharpening!
Are These Questions in Your Mind?
Is it safe to sharpen a knife with another knife?
Yes, as long as you maintain the correct angle and apply the right amount of pressure, it’s generally safe to sharpen a knife with another knife. Always be careful to avoid cutting yourself.
Can I sharpen any type of knife with another knife?
Yes, but it’s best to use knives made of harder steel. Avoid using knives that are too soft, as they might not be effective for sharpening.
Do I need a specific angle to sharpen my knife effectively?
Yes, typically an angle of 15 to 20 degrees works best for sharpening most knives.
Is this method better than using a sharpening stone?
This method is best for minor touch-ups. A sharpening stone is generally more effective for sharpening a severely dull or damaged knife.
Can I use this technique for knives with serrated edges?
No, serrated knives require a different sharpening technique, such as using a specialized serrated knife sharpener.
Is it important to alternate sides while sharpening the knife?
Yes, alternating sides ensures an even sharpening and prevents the blade from becoming uneven or unbalanced.
Do I need to apply a lot of pressure when sharpening the knife?
No, applying too much pressure can damage both knives. Use a light, consistent pressure when sharpening.
Can this technique work with pocket knives?
Yes, you can sharpen a pocket knife with another knife if the blade is not overly damaged.
Is it possible to sharpen a dull knife to the same sharpness as a new one using this method?
No, this method is best for minor touch-ups. For a knife that is extremely dull, you will need more effective sharpening tools like a stone or an electric sharpener.
Can I damage my knives if I do this incorrectly?
Yes, improper technique or applying too much pressure can damage both knives. It’s important to follow the steps carefully and maintain the correct angle and pressure.