
As an Amazon Associate, I earn from qualifying purchases at no extra cost to you.
Siemens Dishwasher Error Code E09 (Fix It Fast Like a Pro)
 ByZayyan
I remember the night my kitchen turned into a giant puddle right before a big dinner party. I had twelve people coming over for lasagna, and my trusty dishwasher decided to go on strike with a cryptic beep. It felt like the machine was personally mocking my hosting skills while I scrubbed pans by hand.
To get your machine back in action, you should start by safely disconnecting the power and pulling the unit out from under the counter to reach the side panels. Once you gain access to the internal components, you must carefully inspect the heat pump assembly for any signs of electrical burnout or physical damage. Most people find that replacing the entire heat pump is the most reliable long term solution since the heating element is integrated into the motor. After you swap the old part for a new one, make sure every hose is tight and the wiring is secure before pushing the unit back and running a test cycle to confirm the heat is finally flowing again.
Why is my dishwasher showing this specific message?
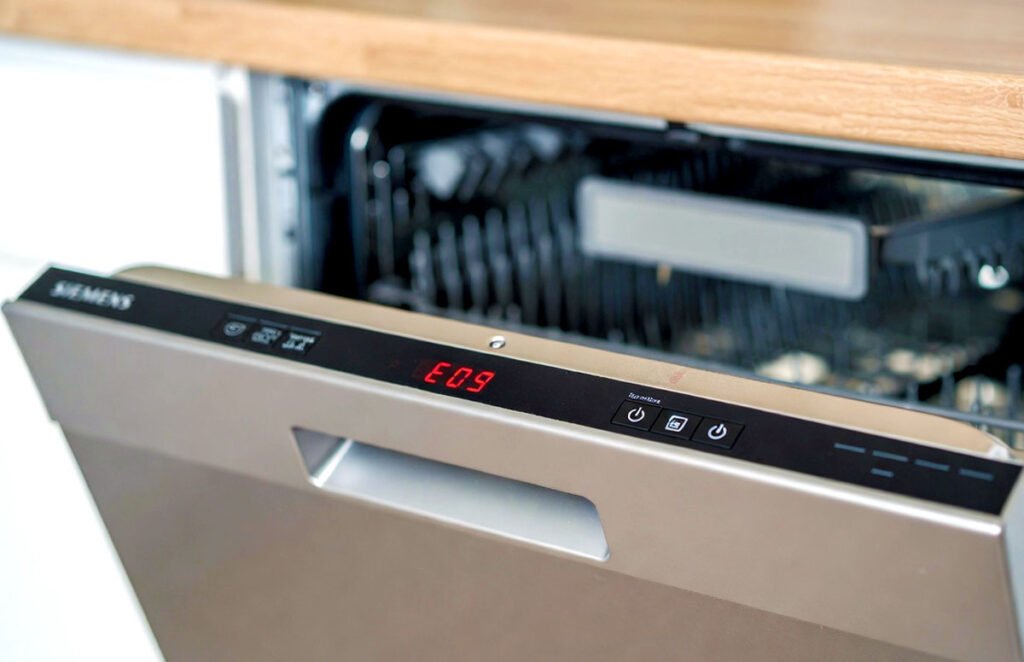
You might be feeling a bit frustrated seeing those glowing red letters on your display screen right now. In my two decades of fixing these machines, I have noticed that this specific error usually pops up at the worst possible time. It essentially means your dishwasher has stopped being able to warm up the water, which is a pretty big deal for getting dishes clean.
When the control board detects that the water temperature isn’t rising as quickly as it should, it triggers a safety shutdown to protect the internal parts. This is actually a good thing because it prevents the system from overheating or causing an electrical short circuit in your kitchen. It is the machine’s way of asking for a professional checkup before things get even worse.
Interestingly, this problem almost always points directly to a hardware failure rather than a simple software glitch or a temporary sensor hiccup. While you might hope that turning it off and on again will fix the issue, the reality is that a physical component has likely reached the end of its life. You are dealing with a broken circuit that needs some hands on attention to get moving again.
- The heating element has likely suffered an internal break.
- Water is remaining cold throughout the entire washing cycle.
- The control module stops the program to prevent further damage.
- Dishes often come out wet and greasy after the cycle.
- Electrical continuity has been lost within the heat pump.
- This error is very common in older Siemens model units.
How to Fix Siemens Dishwasher Error Code E09 (Easy Steps)
Step 1: Safety first and power down
Before you even think about touching a screwdriver, you need to make sure the power is completely cut off from the appliance. Working with water and electricity at the same time is a recipe for disaster, and I want you to stay safe. Reach under the sink or behind the unit to pull the plug out of the wall socket.
If your dishwasher is hardwired directly into the wall, you will need to head over to your main breaker box. Find the switch labeled for the kitchen or the dishwasher specifically and flip it to the off position. This ensures that no stray current can give you a nasty shock while you are digging around inside the machine’s guts.
Once the power is off, you should also turn off the water supply valve to prevent any accidental leaks or flooding. It is much easier to work when you are not worried about a sudden spray of water hitting your floor. Lay down a couple of old towels around the base of the machine just in case there is some lingering moisture.
Take a deep breath and give the machine a few minutes to sit. This allows any remaining electrical charge in the capacitors to dissipate fully before you start removing panels. Being patient during this phase is the mark of a true pro, so do not rush into the mechanical work until you are sure everything is totally dead.
- Unplug the power cord from the wall outlet.
- Flip the circuit breaker for extra safety measures.
- Close the water supply valve under the sink.
- Lay down towels to catch any stray drips.
Step 2: Accessing the internal components
To get to the heart of the problem, you need to remove the outer casing of your dishwasher. Start by opening the door and removing the screws that hold the unit to the kitchen cabinets. This will allow you to slide the whole machine forward a few inches so you can reach the side and bottom panels easily.
Most Siemens models require you to remove the right hand side panel to see the heating assembly clearly. You will likely need a Torx screwdriver for this part, as these European machines love those star shaped screw heads. Keep all your screws in a small bowl or a magnetic tray so they do not go missing in the kitchen floor cracks.
After the side panel is off, you might see a layer of insulation or a plastic moisture barrier. Gently peel this back or move it out of the way to reveal the wires and the large circular motor at the bottom. This motor is actually the heat pump, which is the part we are most interested in for this repair.
Be very careful not to tug on any loose wires or thin plastic tubes while you are moving things around. The internal layout can be quite cramped, and it is easy to accidentally disconnect something else while you are trying to reach the pump. Take a clear photo of the wiring with your phone before you move anything further.
- Remove the mounting screws from the cabinet frame.
- Slide the dishwasher out to access the side.
- Use a Torx driver to remove the metal panels.
- Document the wiring layout with a quick photo.
Step 3: Testing the heat pump resistance
Now that you can see the pump, it is time to use a multimeter to check if the heating element is actually broken. The heat pump has a set of thick wires leading to the heater terminals, usually tucked away near the back of the motor housing. You are looking for a specific resistance reading to see if the circuit is still intact.
Set your multimeter to the Ohms setting and touch the probes to the heater terminals on the pump. If the heater is working perfectly, you should see a reading somewhere between twenty and thirty Ohms. This indicates that electricity can flow through the coil and generate the heat needed to get your water hot for the wash.
If your meter shows an “OL” or a reading of infinity, it means the internal coil has snapped. This is the smoking gun that confirms why your dishwasher is throwing the e09 error code. There is no way to patch a broken internal heating coil, so you will definitely need to buy a brand new pump.
Do not be discouraged if the test confirms a failure because finding the problem is half the battle won. It is much better to know exactly what is wrong than to guess and waste money on parts you do not need. Once you see that infinite reading, you can be 100% confident that a replacement is the right move.
- Set your multimeter to the proper Ohms range.
- Identify the heater terminals on the pump assembly.
- Check for a reading between 20 and 30 Ohms.
- Confirm a failure if the meter shows infinity.
Step 4: Removing the faulty heat pump
Removing the old pump can be a bit of a squeeze, but you can do it with a little bit of persistence. You will need to loosen the metal hose clamps that hold the pump to the main sump assembly. Sometimes these are one time use clamps, so you might need to snip them and use standard screw clamps later.
Carefully wiggle the pump away from the rubber gaskets that seal it to the plastic tub. There might be a bit of water left inside the pump, so keep those towels handy to soak up any small spills. It takes a firm grip and a steady pulling motion to get the pump to pop out of its mounting position.
Disconnect the electrical wiring harnesses by pressing the small plastic tabs on the connectors. Do not pull on the wires themselves, as you could pull the metal pins right out of the plastic plugs. Everything should click apart relatively easily if you are pressing the release triggers in the correct spot on the plastic housing.
Once the old pump is free, take a moment to inspect the area for any debris or buildup. Sometimes bits of glass or hard food can get stuck in the impeller, though that usually causes a different error. Clean the area thoroughly so the new pump can sit perfectly against the gaskets without any grit causing a future leak.
- Loosen the hose clamps around the pump base.
- Carefully pull the pump off the rubber seals.
- Disconnect the wiring harnesses using the plastic tabs.
- Clean the sump area to ensure a tight seal.
Step 5: Installing the new replacement part
Grab your brand new Siemens heat pump and compare it to the old one to make sure everything matches up perfectly. You want to see the same number of wire pins and the same diameter for the water outlets. Installing a new part is basically the reverse of the removal process, but with a bit more care.
Apply a tiny bit of rinse aid or liquid soap to the rubber gaskets to help the new pump slide into place more easily. This trick prevents the rubber from bunching up or tearing while you are pushing the heavy motor into the sump. Align the pump carefully and push until you feel it seat firmly against the plastic housing.
Slide your new hose clamps onto the connections and tighten them down securely with a screwdriver or pliers. You want them tight enough to prevent leaks, but not so tight that you crush the plastic fittings on the pump. Reconnect the electrical plugs, making sure you hear a satisfying click for each one to ensure a solid connection.
Double check your photo from earlier to make sure every wire is back in its original home. It is very easy to swap two similar looking plugs if you are not paying close attention to the colors or positions. Once everything is plugged in and clamped down, you are almost ready to put the machine back together.
- Lubricate the rubber gaskets with a bit of soap.
- Firmly seat the new pump into the sump.
- Tighten the hose clamps to prevent any leaks.
- Click the electrical harnesses back into their slots.
Step 6: Testing the dishwasher and finishing up
Before you slide the dishwasher back into the cabinet, it is a smart idea to run a quick test. Turn the water supply back on and plug the unit into the power outlet. Select a short wash cycle that uses heat and hit the start button while keeping an eye on the pump area for leaks.
Watch the connections closely for the first few minutes as the machine fills and starts to circulate water. If you see even a tiny drop of moisture, stop the cycle and tighten your clamps a little bit more. It is much easier to fix a small leak now while the side panel is still off.
As the cycle progresses, touch the side of the tub or wait for the first drain to see if the water feels warm. If the e09 code stays away and the water gets hot, you have successfully fixed the problem. This is the moment where you can finally celebrate your DIY skills and the money you just saved on a repairman.
Finally, slide the unit back under the counter and replace the side panel and the mounting screws. Make sure the dishwasher is level so the door closes properly and the water drains correctly. Now you can get back to your life without having to worry about a mountain of dirty dishes piling up in the sink.
- Turn on the water and power for testing.
- Run a short cycle to check for leaks.
- Confirm the water is heating up as expected.
- Reassemble the panels and level the machine.
How can I prevent this heating error from happening again?
You probably never want to see that error code again after going through all this work. While some component failures are just due to old age, there are a few things you can do to extend the life of your new heat pump. Keeping the system clean and running efficiently reduces the stress on the heating element and the motor.
One of the best things you can do is avoid using too much detergent, which can cause excessive sudsing. High levels of foam can actually air lock the pump, causing it to run dry and overheat the element. Using the right amount of high quality tabs ensures that the water stays liquid and keeps the heater cooled down during the cycle.
You should also make a habit of cleaning your filters every single week to ensure maximum water flow. When the filters are clogged, the pump has to work much harder to move water through the system, which can lead to premature failure. A little bit of maintenance goes a long way in keeping your Siemens dishwasher happy and healthy for the long haul.
- Use high quality detergent tabs in the correct dosage.
- Clean the mesh filters at the bottom every week.
- Run a dedicated machine cleaning cycle once a month.
- Check the spray arms for clogs to maintain flow.
- Ensure your water softener is set to the right level.
- Avoid pre rinsing dishes too much to keep sensors happy.
Final Thoughts
You should feel incredibly proud of yourself for taking on this repair. Fixing a modern appliance might seem scary at first, but once you break it down into steps, it is totally manageable. Your dishwasher is now ready to handle those messy dinner parties again, and you have the satisfaction of knowing exactly how it works. Keep those filters clean, and your machine will serve you well for many more years to come.
| Step Name | Difficulty Level | Parts Needed | Pro Tip |
| Preparation | Easy | Towels | Always double check the breaker is off. |
| Panel Removal | Medium | Torx Screwdriver | Keep screws in a bowl so they don’t roll. |
| Testing | Medium | Multimeter | Take a photo of the meter reading for proof. |
| Replacement | Hard | New Heat Pump | Use dish soap to help gaskets slide on. |
Frequently Asked Questions (FAQs)
Is it worth fixing a Siemens dishwasher with an e09 error?
It is almost always worth fixing because these machines are built with high quality components that can last a long time. Replacing a heat pump is much cheaper than buying a brand new high end dishwasher. If the rest of the machine is in good physical shape, a repair will give it a second life.
Can I just reset the dishwasher to clear the code?
You can try to reset the machine by holding the start button, but this rarely solves an e09 error permanently. Since this code usually indicates a physical break in the heating element, the error will just pop back up as soon as the water fails to heat. You need to address the hardware.
Do I need special tools to change the heat pump?
You will mostly need standard tools like a Torx screwdriver, pliers, and a multimeter for testing. Some models might have specific hose clamps that require a pair of side cutters to remove. It is a good idea to have a flashlight handy so you can see into the dark corners.
Is it safe to use the dishwasher while it has this error?
It is not recommended to keep using the machine while the error is active. Since the water is not heating, your dishes will not be properly sanitized or cleaned of grease. Furthermore, running a faulty electrical component could potentially cause more damage to the main control board over time.
Can I replace just the heating element instead of the whole pump?
On most modern Siemens models, the heating element is manufactured as a built in part of the heat pump housing. This means you cannot simply swap a coil like you might on an old oven. You have to replace the entire assembly to restore the heating functionality to your unit.
Do I have to pull the dishwasher out of the cabinet?
Yes, you generally have to slide the unit forward to gain access to the side panels and the bottom components. It is impossible to reach the heat pump from just the front or the inside of the tub. Just be careful not to stretch the drain hose or power cord.
Is the e09 error common for Siemens dishwashers?
This is actually one of the most common issues seen in European dishwashers like Siemens and Bosch. The integrated heat pump design is very efficient, but the heating traces can wear out after several years of constant thermal expansion. It is a well known repair in the appliance industry.
Can hard water cause the heating element to fail?
Hard water can definitely play a role in the premature failure of your heating system. Limescale buildup acts as an insulator, forcing the element to get much hotter than intended to heat the water. Using salt in your dishwasher’s softener unit can help prevent this specific type of wear.


