As an Amazon Associate, I earn from qualifying purchases at no extra cost to you.
Whirlpool Dishwasher Error Code F2E2: Fix It Now (Easy Steps)
 ByZayyan
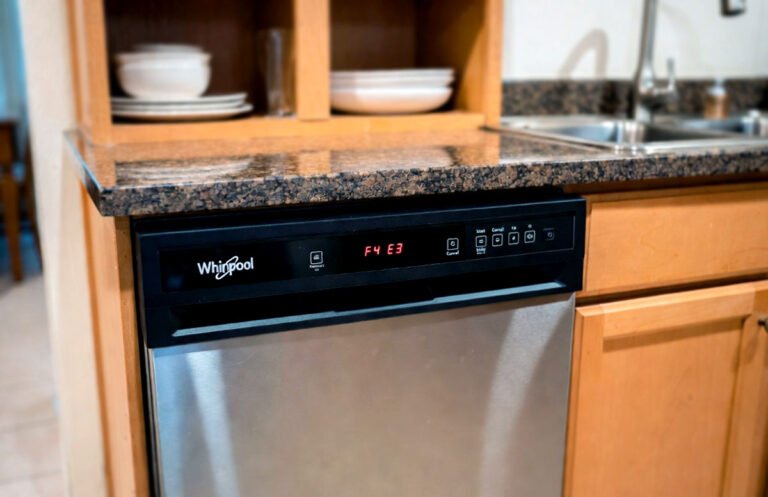
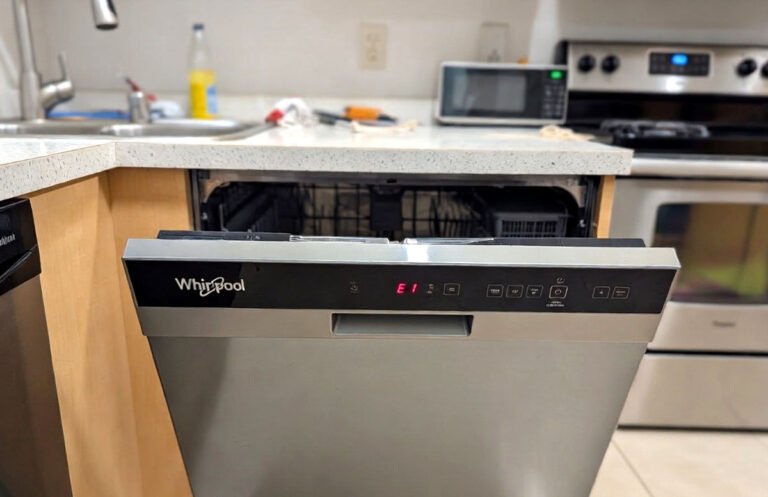
The kitchen floor is a lake of soapy water and the sink is overflowing with crusty dinner plates. You press the start button only to see that blinking F2E2 code mocking you from the display panel. It feels like the machine is actively working against your sanity right now.
The F2E2 code is a communication failure between your user interface and the main control board, which usually means a loose connection or a fried circuit. You can often fix this by reseating the delicate ribbon cable hidden behind the door panel or checking for moisture damage on the pins. If the wires are fine, you are likely looking at replacing the electronic control board located at the bottom of the unit.
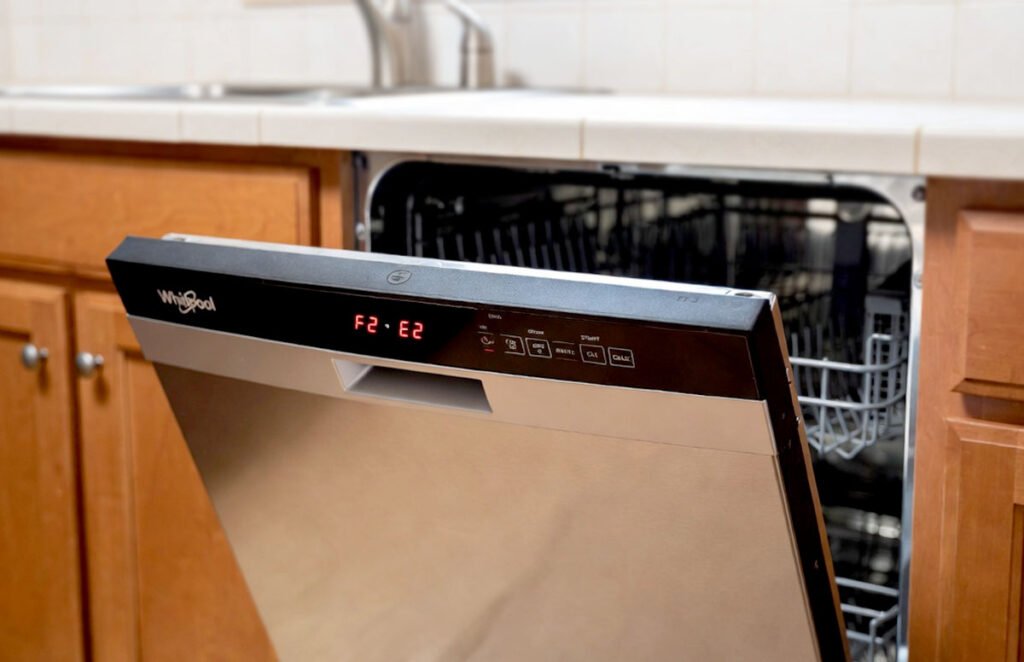
What is the Whirlpool F2E2 Error Code?
This specific error means your dishwasher has developed a case of digital amnesia. The user interface, which is the part you touch to select cycles, cannot talk to the main control board, which is the brain that tells the motor to run. When these two parts stop communicating, the machine freezes up as a safety precaution. It is a common headache in modern Whirlpool models that rely heavily on sensitive electronics.
Most people assume the whole machine is dead, but it is usually just a physical break in the data path. Steam from a heavy cycle often sneaks into the door assembly and corrodes the tiny copper traces on the ribbon cable. Over time, this moisture creates high resistance or a short circuit. Your dishwasher tries to send a signal, gets no reply, and throws the F2E2 code to stop itself from malfunctioning further.
If you have recently moved the unit or slammed the door hard, a connector might have simply vibrated loose. The main control board expects a constant handshake from the interface. When that handshake is interrupted by a loose plug or a pinched wire, the software triggers the alarm. It is a frustrating issue because it completely disables the appliance, but the fix is often just a matter of careful cleaning and plugging things back in.
- Corroded ribbon cable connectors from excessive steam.
- A loose wiring harness between the door and the base.
- Faulty main power control board near the floor.
- Shorted out user interface touch pad.
- Pins on the control board becoming bent or burnt.
- Recent power surges damaging the sensitive logic chips.
How to Fix It Like a Pro: Whirlpool Dishwasher Error Code F2E2
Disconnect the Power and Remove the Outer Door
Safety is your first priority so head to the breaker box and flip the switch for the dishwasher. You can also unplug it from under the sink if you have a corded model. Open the door and look for the Torx T15 screws lining the inner stainless steel perimeter. You will need a long neck screwdriver to reach them without scratching the metal. Keep a firm grip on the outer panel as you remove the final two screws so it does not fall.
Carefully let the outer door skin lean forward toward the floor. You will see a web of wires and a plastic shield protecting the control components. Take a photo of the wiring now so you remember exactly how the factory routed those colored lines. There is usually a small plastic clip holding the main harness in place. Release that clip gently with a flathead screwdriver to give yourself some room to work on the internals.
Make sure you do not let the door panel hang by its wires because that will tear the connectors. Place the panel on a soft rug or a piece of cardboard to avoid scratching your kitchen floor. This initial step reveals the heart of the communication system. You are now looking at the interface board tucked inside the top of the door. Check for any obvious signs of black scorch marks or green corrosion on the green circuit boards.
- Flip the circuit breaker to ensure the unit is totally dead.
- Use a Torx T15 driver to remove all door perimeter screws.
- Support the outer panel so it does not crash down.
- Document the wiring layout with your phone camera for reference.
Inspect the Interface Ribbon Cable Connections
Look for the flat, gray ribbon cable that connects the buttons to the main harness. This cable is incredibly fragile and uses a friction fit or a small locking tab to stay in place. Pull the cable out and look at the silver or gold fingers at the end of the plastic. If they look dull or have a white crust, that is your culprit. Moisture has likely caused a bad connection that is blocking the data.
Grab a clean pencil eraser and gently rub the metal contacts on the end of the ribbon cable. This is an old technician trick that removes oxidation without damaging the thin metal layer. You want those contacts to be shiny and bright like a new coin. If the cable is actually torn or creased, the eraser won’t help. A physical break in the plastic means you need a brand new cable to restore communication.
After cleaning, spray a tiny bit of electronic contact cleaner into the female port where the cable plugs in. Blow it dry with some compressed air or just wait a few minutes for it to evaporate. Reinsert the cable firmly until it clicks or bottoms out in the slot. Give it a very light tug to make sure it is locked tight. A loose fit here is the most frequent cause of an intermittent F2E2 error code.
- Locate the flat ribbon cable connecting the interface to the harness.
- Check for green corrosion or white mineral buildup on contacts.
- Clean the metal tips using a standard pencil eraser.
- Ensure the cable is fully seated and locked in its port.
Access the Main Control Board at the Bottom
If the door wires look perfect, the problem is likely at the other end of the line. You need to remove the bottom kickplate or toe kick panel by unscrewing the two 1/4 inch hex head screws at the base. Once the panel is off, you will see a plastic box on the right side. This box houses the main control board. It is often tucked behind a layer of insulation that you should move aside.
Use your 1/4 inch nut driver to remove the single screw holding the plastic control box to the dishwasher frame. Slide the box forward and unclip the plastic lid to reveal the circuit board inside. This area is prone to catching leaks from the pump, so look for any signs of water entry. If the box feels wet or smells like burnt plastic, the board has likely shorted out and will need to be replaced entirely.
Unplug each wire harness one at a time and inspect the pins for any signs of heat damage. Sometimes a high amp draw from the heater or motor can melt the plastic connectors near the communication pins. If everything looks clean, go ahead and reseat every single plug to ensure a solid connection. Dust and vibration can sometimes create just enough space for the digital signal to drop out during a hot wash cycle.
- Remove the bottom toe kick panel using a 1/4 inch driver.
- Unscrew the plastic junction box housing the main control board.
- Inspect the board for water damage or burnt smell.
- Unplug and firmly reseat every wire harness on the board.
Check the Door Latch and Strike Alignment
A sneaky reason for communication errors is a door that thinks it is open when it is actually closed. Locate the door latch assembly at the very top center of the tub. It uses a small microswitch to tell the control board that the unit is sealed. If the latch is loose or the strike plate is bent, the handshake between the boards might get interrupted. This causes the software to glitch and display the F2E2 code.
Check the two screws holding the latch in place to make sure they haven’t backed out over time. Use your multimeter to test for continuity on the door switch terminals. With the switch pressed in, you should see a reading near zero ohms. If the switch stays open even when clicked, the control board never gets the “go” signal. This lack of feedback can lead to a communication timeout which manifests as an error on the display.
Look at the plastic hook on the door itself to see if it is chipped or worn down. If the hook doesn’t push the latch far enough, the connection won’t be stable. You can sometimes shim the latch forward or adjust the leveling legs of the dishwasher to fix the alignment. A dishwasher that is tilted too far forward will cause the door to hang awkwardly. This creates a gap that prevents the sensors from talking to each other correctly.
- Inspect the door latch at the top of the tub.
- Test the microswitch for continuity using a digital multimeter.
- Check the strike plate and door hook for physical wear.
- Verify the dishwasher is level so the door closes squarely.
Test the Wire Harness Continuity Across the Hinge
The wires that connect the brain to the faceplate have to bend every single time you open the door. Over several years, those wires can fray or break inside the plastic insulation right at the hinge point. You might see a wire that looks fine on the outside but is snapped on the inside. This creates an intermittent connection that drives people crazy. You need to inspect the black mesh sleeve running under the door.
Slide the mesh sleeve back to expose the individual colored wires. Look for any wires that feel soft or stretchy, as that usually indicates the copper inside has broken. If you find a broken wire, you can strip the ends and use a heat-shrink butt connector to join them back together. Do not use wire nuts or electrical tape because the constant movement of the door will pull them apart in a few days.
If you cannot see a break, use your multimeter to perform a “wiggle test.” Put one probe on the connector at the top of the door and the other on the corresponding pin at the bottom board. Have a friend move the door up and down while you watch the meter. If the resistance jumps around or goes to “OL” during the movement, you have a broken wire in the harness. Replacing the entire harness is the most reliable long term fix.
- Expose the wire bundle located at the bottom door hinge.
- Look for frayed insulation or wires that feel overly flexible.
- Repair broken wires using permanent heat-shrink butt connectors.
- Perform a multimeter wiggle test while moving the door.
Clear the Error Memory and Reassemble
Once you have cleaned the cables and checked the wires, it is time to put everything back together. Carefully tuck the wires back into their original paths so they don’t get pinched by the metal door skin. Reattach the outer door panel and tighten the Torx screws, starting from the top to hold it in place. Make sure the panel is flush with the control console before you tighten everything down or the buttons might stick.
Go back to your breaker box and restore power to the appliance. The dishwasher might still show the code until you perform a hard reset. Press the first three buttons on the left of the keypad in sequence: 1-2-3, 1-2-3, 1-2-3. Do not wait more than a second between presses. This enters the diagnostic mode and forces the boards to talk to each other. All the lights on the display should illuminate at once.
Let the diagnostic cycle run for a few minutes or press the Start button to cancel it and clear the codes. If the F2E2 error does not return immediately, you have successfully fixed the communication bridge. Try running a short Rinse cycle to verify that the buttons respond and the timer counts down. If the code pops up again instantly, you likely have a dead logic chip on either the interface or the main board.
- Carefully reassemble the door and the bottom kickplate.
- Restore power and enter diagnostic mode by pressing 1-2-3 thrice.
- Clear the saved error codes from the machine memory.
- Run a test Rinse cycle to confirm the repair works.
How Can I Prevent the F2E2 Error in the Future?
Keeping your dishwasher healthy is mostly about managing moisture and heat. The F2E2 code usually starts with steam escaping through the top of the door and hitting the electronics. You should check your rubber door seal every few months to make sure it is soft and free of food debris. If you see steam billowing out of the top corners during a cycle, your seal is failing and needs to be replaced.
You can also help the electronics by not overusing the “High Temp Wash” or “Sani-Rinse” settings. These modes increase the internal temperature significantly, which creates more pressure and steam. While they are great for greasy pans, the constant heat cycles can stress the solder joints on the control boards. Try using the “Normal” cycle for everyday loads and only use the heavy settings when they are absolutely necessary for sanitation.
Finally, make sure you are using a high quality rinse aid to help water shed off the dishes and the inner door. When water lingers on the stainless steel, it keeps the humidity inside the tub high for hours after the cycle ends. If you open the door immediately after a cycle, a huge cloud of steam hits the control panel. Let the machine sit for twenty minutes after the “Clean” light hits so the internal components can cool down naturally.
- Clean the rubber door gasket to prevent steam leaks.
- Limit the use of extreme heat settings like Sani-Rinse.
- Always use rinse aid to reduce internal tub humidity.
- Wait twenty minutes before opening the door after a wash.
- Check that the dishwasher is perfectly level in the cabinet.
- Avoid using excessive detergent which creates corrosive oversuds.
Final Thoughts
Dealing with an F2E2 code is definitely a test of patience, but you don’t always need a repairman to save the day. Most of the time, the fix is just about restoring a simple connection that got dirty or loose. Take your time, be gentle with those ribbon cables, and remember to cut the power before you start poking around. You have the skills to get your kitchen back in order today.
| Steps | Difficulty Level | Parts Needed | Pro Tip |
| Inspect Ribbon | Easy | Eraser, Contact Cleaner | Don’t touch the gold pins with bare fingers. |
| Door Latch Check | Medium | Multimeter | Use a screwdriver to manualy trip the latch. |
| Hinge Wire Test | Hard | Wire Strippers, Connectors | Look for “necking” in the wire insulation. |
| Board Reseat | Medium | 1/4″ Nut Driver | Label your plugs with masking tape first. |
Frequently Asked Questions (FAQs)
Is it safe to leave the dishwasher plugged in while I work?
No, it is absolutely not safe to work on the electronics with the power on. Dishwashers use high voltage that can cause serious injury or even death if you touch the wrong terminal. Even if you are just checking a ribbon cable, a small spark can fry the expensive logic chips on the board. Always flip the breaker or pull the plug before you remove any access panels or touch the internal wiring harnesses.
Can I use WD-40 to clean the electrical contacts?
You should never use standard WD-40 on your dishwasher electronics because it leaves behind an oily residue that can actually attract dust and cause a fire. If you need to clean the pins, use a dedicated “Electronic Contact Cleaner” which is designed to evaporate completely without leaving a film. A simple pencil eraser is often the safest tool for cleaning the flat ribbon cables because it is dry and won’t cause any chemical damage to the plastic.
Do I need to buy a whole new control board?
Not necessarily, because the F2E2 code often points to a wiring issue rather than a total hardware failure. You should always perform the cleaning and reseating steps before spending money on a replacement board. If you find that the wires are perfect and the cleaning doesn’t help, then you can conclude the logic chip has failed. Purchasing a board should be your last resort after you have ruled out the cheaper physical connection problems.
Is it possible the user interface is the problem?
Yes, the user interface is the part that actually takes the most abuse from steam and wet fingers. If the buttons feel sticky or some of the lights are dim, the interface board might be the source of the communication failure. Since the F2E2 code is about two parts not talking, it is sometimes a coin flip whether the “speaker” or the “listener” is the one that broke. Replacing the interface is usually easier than the main board.
Can a power surge cause this error code to appear?
Power surges are a very common cause for digital communication errors in modern appliances. If your neighborhood had a storm or a transformer blew recently, the sudden spike in voltage could have glitched the memory on the control board. Before you take anything apart, try a “hard reset” by leaving the dishwasher unplugged for ten full minutes. This allows the capacitors to drain and sometimes clears a “ghost” error code without any actual repairs.
Do I need special tools to fix this error?
You will need a few basic tools that most homeowners have in a standard kit. A Torx T15 screwdriver is the most important one because that is what Whirlpool uses for the door assembly. A 1/4 inch nut driver or socket is needed for the bottom panels and the control box. A digital multimeter is very helpful for testing wires, but you can do a lot of the visual inspections and cleaning without needing any fancy electrical testing equipment.
Can I bypass the door sensor to test the machine?
While technicians sometimes use jumpers to bypass switches, it is extremely dangerous for a DIY repair. If you bypass the door sensor and the latch fails, the dishwasher could spray hot water all over your kitchen while the door is open. It is much better to test the switch with a multimeter for continuity while it is disconnected from power. If the switch is bad, spend the fifteen dollars to buy a new one rather than risking a flooded house.
Is the F2E2 code different from the F2E1 code?
The F2E2 and F2E1 codes are very similar but they point to slightly different directions in the communication path. F2E1 usually implies a stuck key on the keypad, while F2E2 is a more general “I can’t hear you” message between the two main boards. However, the troubleshooting steps are almost identical for both. You will still be checking the ribbon cables, looking for moisture, and ensuring the wiring harness hasn’t been chewed by a mouse or frayed by the hinge.